

This site contains affiliate links. Please see Policies for more information.
This is a sponsored conversation written by me on behalf of Cricut. The opinions and text are all mine.
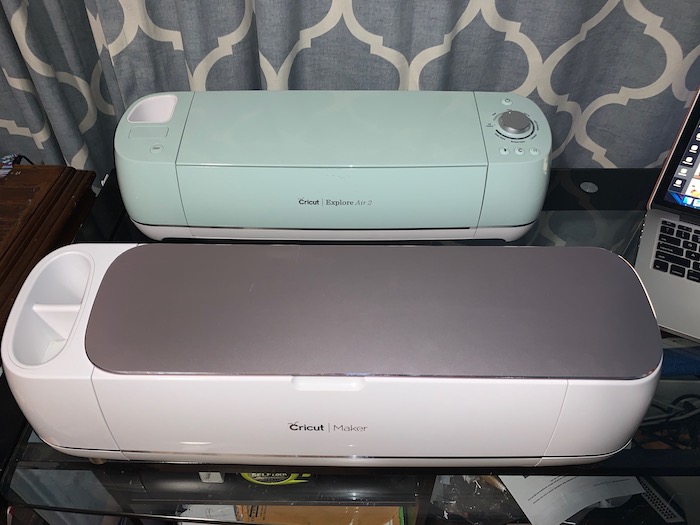
Are you trying to figure out which Cricut is right for you? Today I’m sharing my views on the Cricut Maker vs Cricut Explore Air 2. I have one of each of these machines and they both do similar but different things!
There are positives and negatives to both machines, each one is a standout in one particular area, and of course I’m going to tell you which of these machines I think you should buy if you are trying to make gorgeous paper sunflowers for an event, day of crafting, or just for fun!
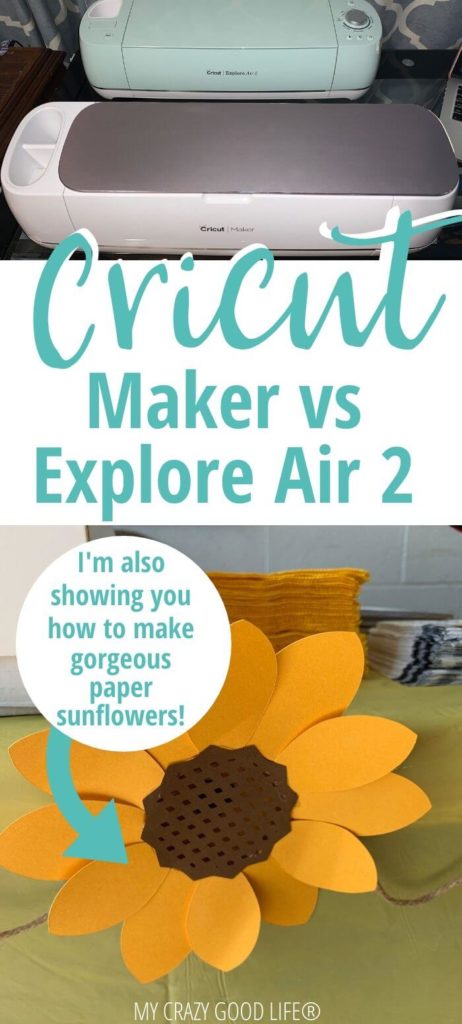
Cricut Maker Vs Cricut Explore Air 2 | Which Cricut Is Right For You?
If you are new to the Cricut world you might be searching for answers to questions like “which Cricut should I buy” because there are a lot of options out there now. Some people believe that if you are going to make an investment you should just buy the Cricut that is newest and that way you are up to date. Others like to buy their machines used and are trying to figure out which Cricut will do what they need for the least amount of up front investment!
Today I’m comparing the Cricut Maker vs Explore Air 2, I have one of each of these machines currently and I’ve used both extensively for a variety of projects and material types. I have also used the Cricut Explore One machine so I may throw a few mentions in there about that machine as well.
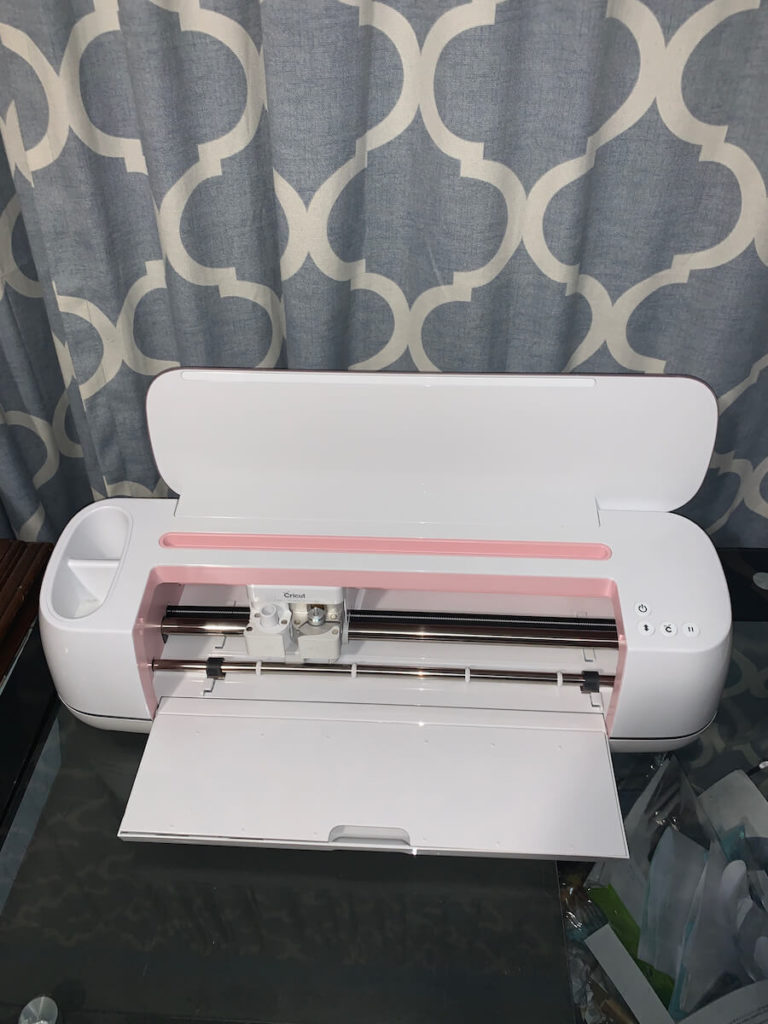
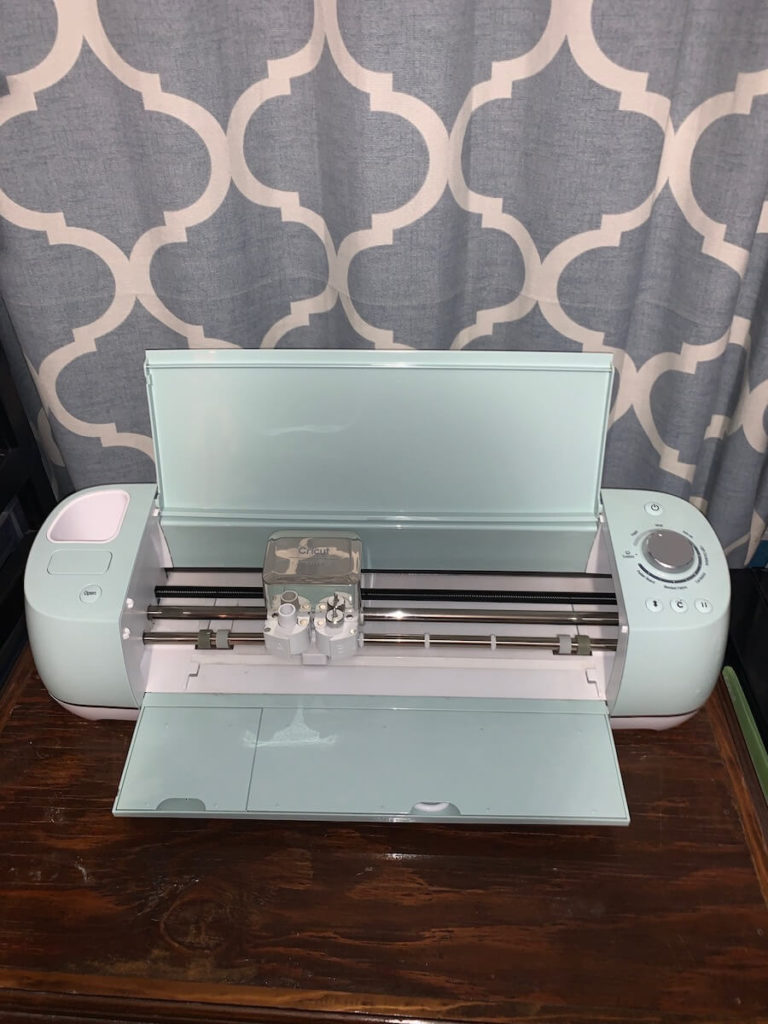
First things first. The Cricut Maker is the newest machine that Cricut has on the market as of now as of November 2019. The Cricut Explore Air 2 was its predecessor. The Explore Air 2 machine made some major updates and improvements and introduced the speed cutting feature, so it’s certainly no slouch on the crafting scene.
Which Cricut machine cuts the most materials?
The Maker cuts more materials than the Explore Air 2 or any of the earlier models of cutting machines. It is able to do this because of the new adaptive tool system. There are knife blades, rotary blades, and scoring wheels that can do so much more than the regular blade and the deep cut blade of the previous systems.
When it comes to materials, the Cricut Maker vs Cricut Explore Air 2 are close but the Maker comes out ahead. It can cut fabric, wood, leather, and more with ease!
The Cricut Maker and the Cricut Air 2 can cut and write on a TON of materials. The Air 2 is at 100+ and the Maker is at 300+ so if you really want to go for it you could have one of each and be cutting pretty much any craft material out there. Precise cutting on literally hundreds of materials is incredible when you think about it.
Which Cricut machine works faster?
In my experience using both the Cricut Air 2 vs Cricut Maker I have to say that I don’t notice a significant increase in speed with the Maker. For everyday projects it’s not something that really makes an impact. If you are looking for speed when cutting things like vinyl, paper, cardstock, etc. you will be just fine with the Explore Air 2 which has an option (like the Maker) for extra speed during cutting!
I will say that the Cricut Explore Air 2 is a noticeable improvement over the Explore Air machine in the speed arena. So if you are buying used machines I would consider that if you want to be able to cut things faster. Small business owners who use their machines to cut materials for projects know what I’m talking about!!
Can I use Bluetooth with Cricut Explore Air 2?
Yes! I know some people get nervous about being able to connect to their machines that are not the newest or latest and greatest, etc. You can use Cricut Design Space with all of the currently available Cricut Machines (Cricut Explore One, Cricut Explore Air, Cricut Explore Air 2, Cricut Maker). The Cricut Explore One machine requires a bluetooth adaptor but the Explore Air 2 and Maker both come with bluetooth capabilities built in.
That being said, you can still connect both of these machines with a USB cord. Sometimes this is a faster option if you don’t want to wait for your machine to connect to your computer, etc. The Cricut Maker which sits directly aside of my computer most days gets plugged in with a USB cord because I find it simpler. When I travel with my laptop and my cutting machines they both use Bluetooth to connect!
How do I select my materials with my Cricut machines?
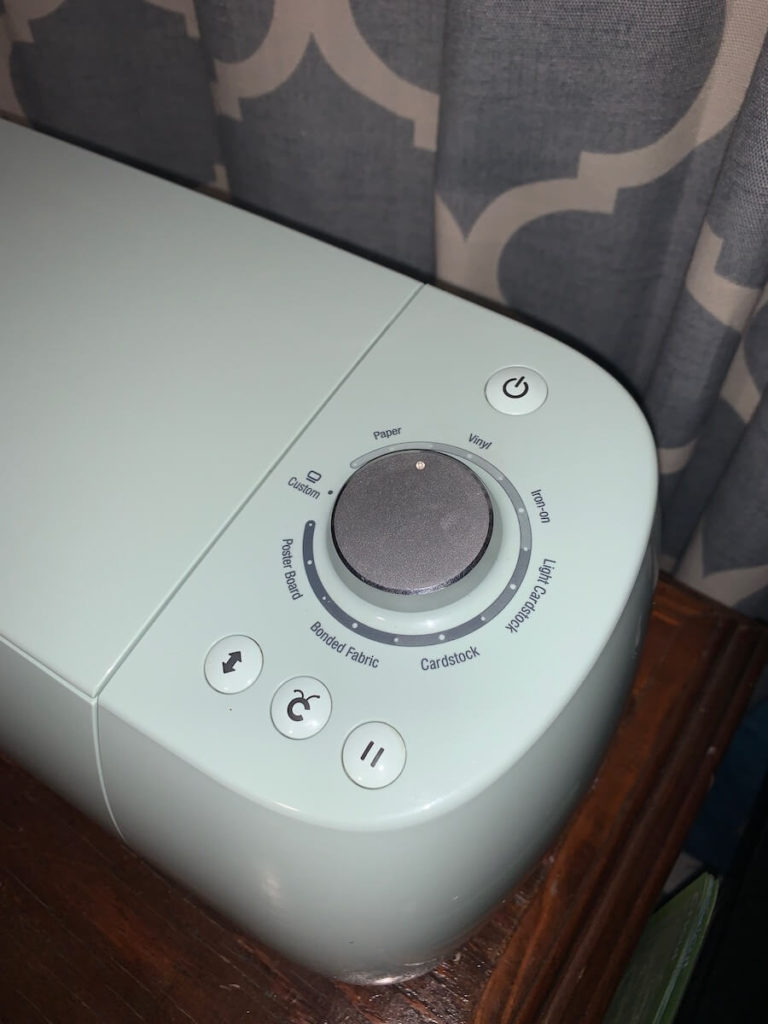
This is one of the big areas where the Cricut Maker vs Cricut Air 2 machines differ and it’s something that people either love or hate. I’m in either camp depending on the kind of day I have had and how many times I have forgotten to select my materials with the smart dial or the screen!
The Cricut Maker uses no dial. It’s not even part of the machines design anymore, whereas the Cricut Explore Air 2 machine has a smart dial right on top where you can see it and move it depending on your project! You select your materials on the cut screen in Design Space when you are ready to begin cutting for the Cricut Maker!
Can I use Cricut Pens with both machines?
If you are planning to use your Cricut Maker or Cricut Explore Air 2 for writing and cut files you will be happy to know that both have the capability to to both cut and write on the same mat. They both have dual tool holders meaning you can put two different tools into your machine at once for cutting, scoring, deep cuts, writing, etc.
How much do these Cricut machines cost?
Another place where the Cricut Maker vs Cricut Explore Air 2 machines differ is in price. The Explore Air 2 starts at $249 and the Maker starts at $399. The Explore One is a bargain at $179 but you can easily get Cricut Explore Air 2 models on their website on sale for $199 (as some of them are right now)! When it comes to resale value for either machine you are going to see more value with the Maker since it hasn’t been on the market very long, the Explore Air 2 as I mentioned goes on sale brand new for $199 so the value there will fluctuate.
If you are purchasing a used machine I would make sure that you are getting a good value for your money since your new machine will come with a factory warranty from Cricut and will also come with brand new mats, cutting blade, etc. Those these items are replaceable it is a cost, so if it adds up to more than a new machine it may not be worth buying a used one!
Which Cricut cutting machine do I need?
In my opinion the Maker is great for people who are seriously into crafting and Cricut crafting specifically. The Explore Air 2 is easy enough for anyone to master and it cuts enough materials that you will never be bored!
If you are a confident crafter I say go for the Maker, it’s a good investment and it is more than qualified to help home and business crafters be successful. If you just want to cut standard materials like paper, vinyl, and even leather, the Air 2 or even the Air or Explore One machines will suffice!
Doing some Cricut shopping?
If you have figured out which machine is for you and now you are ready to shop…these are the links you will need to find genuine Cricut machines, accessories, materials, and more!
- Cricut Machines
- EasyPresses
- BrightPad
- All Cricut Vinyl
- Mats
- Premium Cricut Access
- Cricut Access Fonts
- Cricut Flash Sales
Let’s make some Cricut sunflowers!
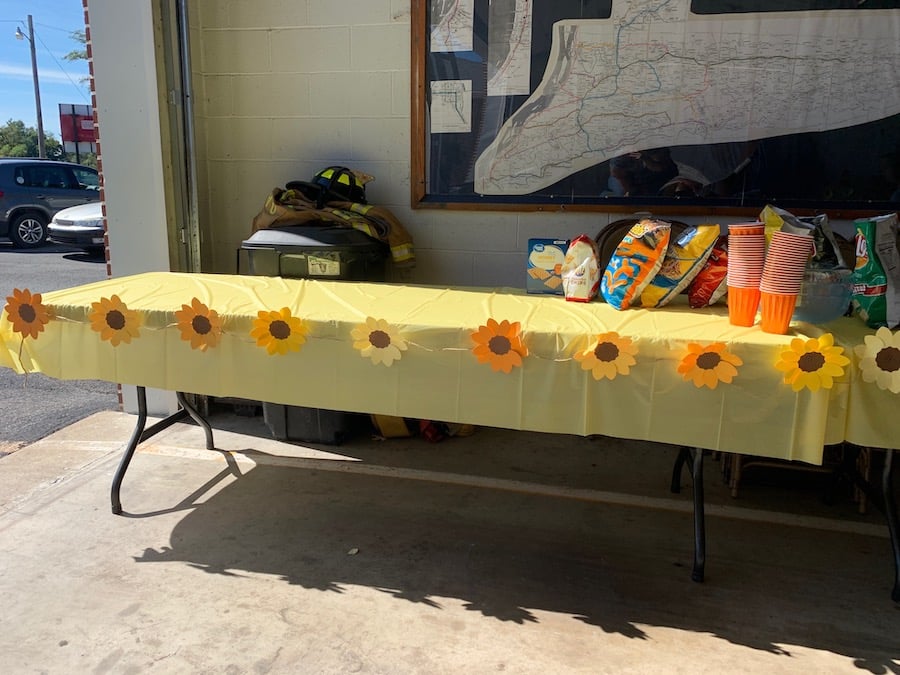
You don’t think I’d send you away without a Cricut craft to try, right?! Today we’re going to make some paper flower garlands. You can use these sunflower svg and leaf svg files to make whatever you like. I made sunflower garlands for my sister bridal shower and I’m going to show you how easy it is to put these together for yourself using your Cricut Maker or Cricut Explore Air 2!
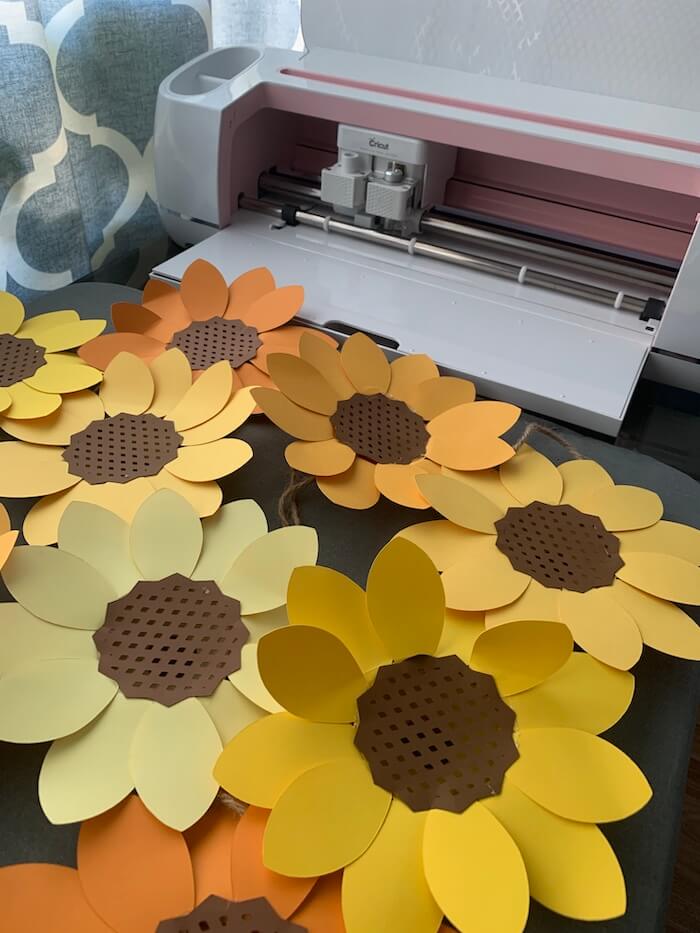
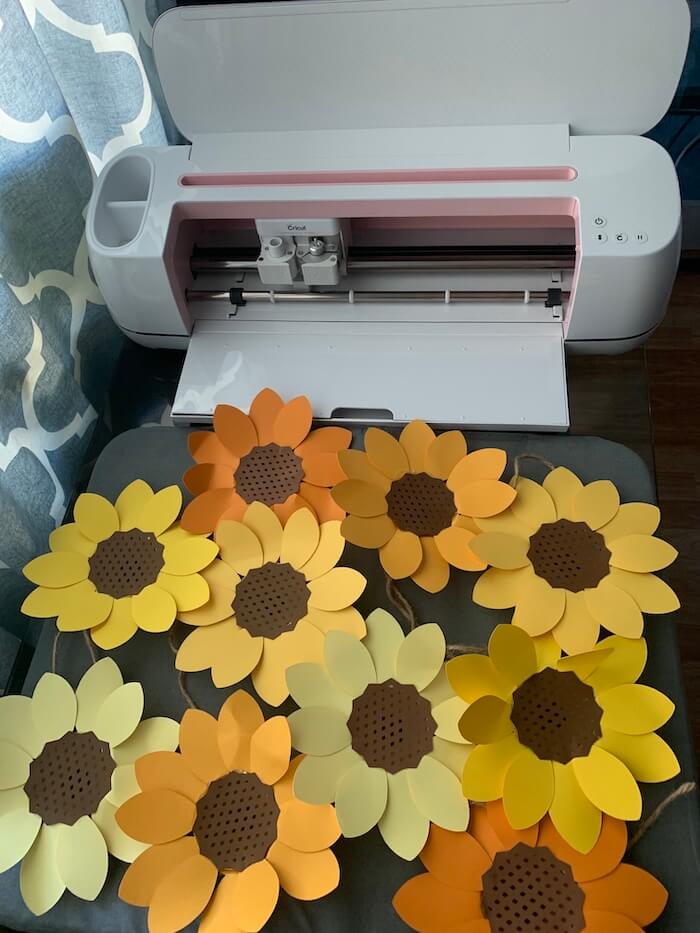
I used both machines while making these Cricut sunflowers. I had one machine set up to cut petals and one set up to cut the middles. We didn’t use the leaves for all the flowers because they were being attached to a piece of rope where you wouldn’t really see them!
Here’s what you will need to make these paper sunflowers:
- Cardstock (whatever colors you like)
- Petal Color
- Middle Color
- Middle Cover Color
- Leaves
- Hot Glue Gun & Glue
- Twine
- Cricut Cutting Machine (they all cut paper, so any one will work)
- Cricut Cutting Mats (I used both older green mats and blue mats)
- Blue mats are recommended for paper
- Green mats that have lost a bit of their sticky will work too
- Sunflower SVG
- You can use anyone you like, I used this free one!
- Patience (if you are making more than 50, like me)
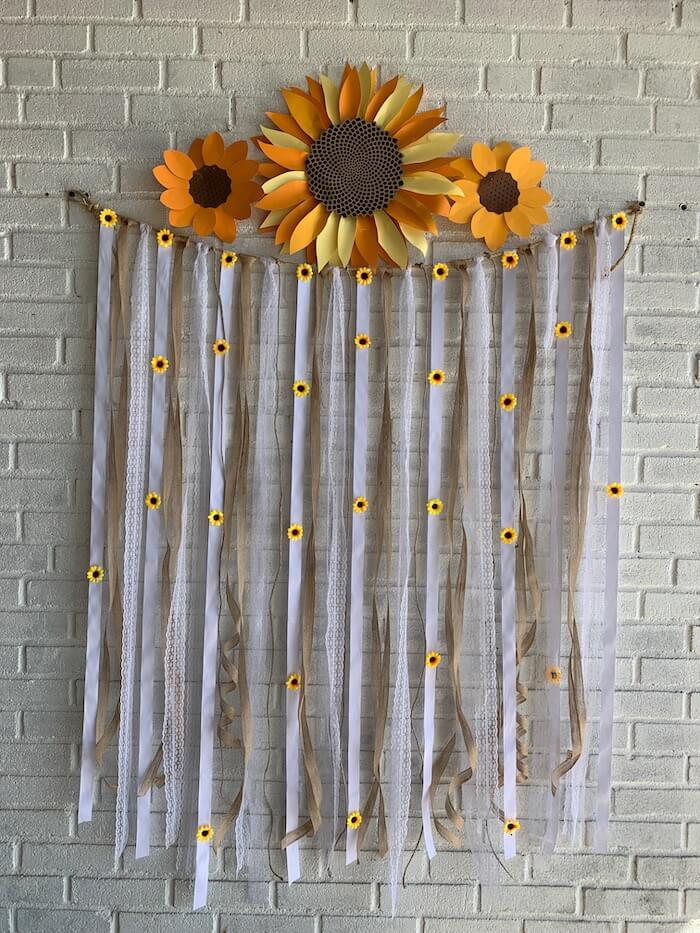
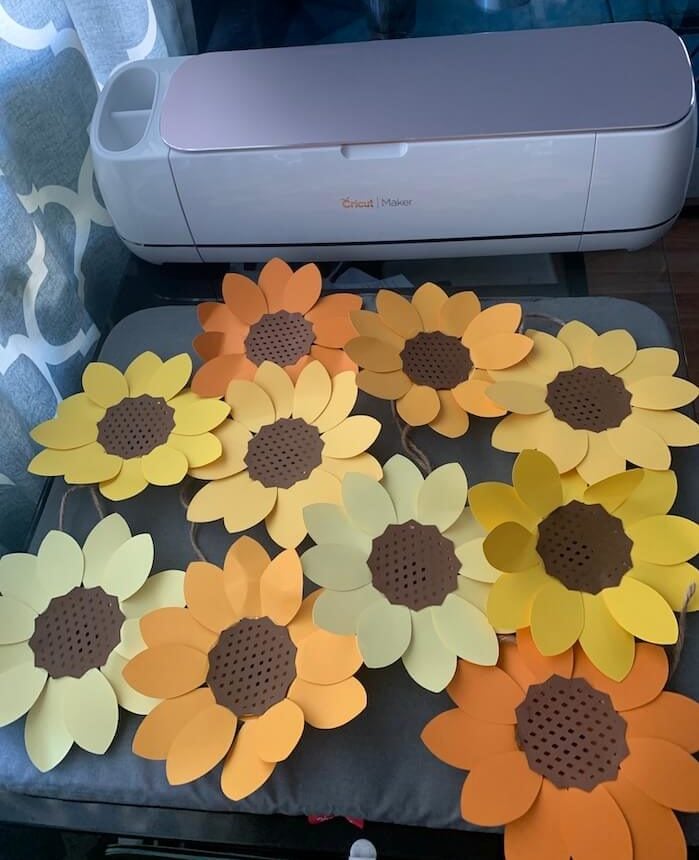
You can make a variety of sizes and style of Cricut sunflowers to make a nice statement wall for photos!
Here’s how we made these gorgeous paper sunflower garlands:
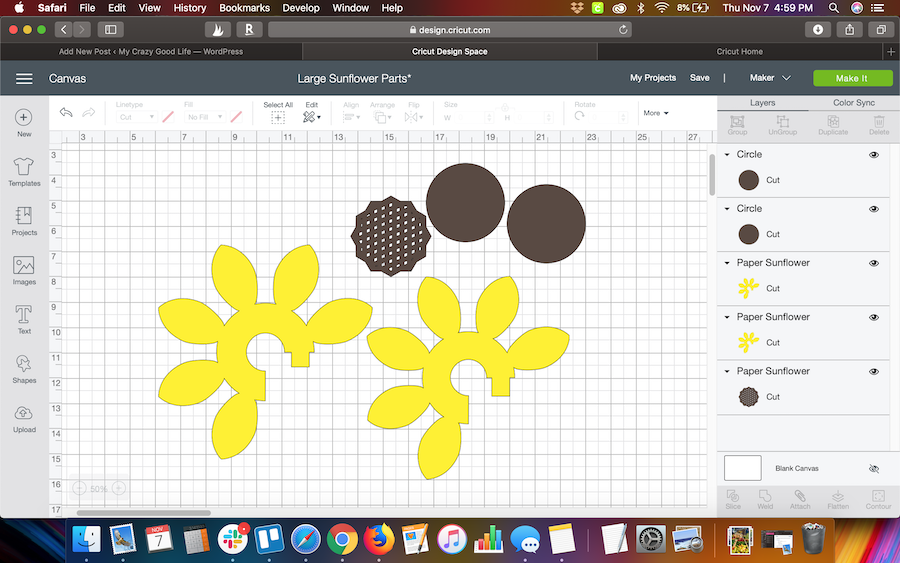
- Download your cut file and upload it to a new project on Cricut Design Space, size it to fit your intended use. In this case I made it a bit smaller than was standard.
- Ungroup the pieces and delete anything you don’t intend to use, this will make the cutting process a lot quicker and easier! Add in a circle that is roughly the size of your middle piece, you can cut this in any color, you will need two for each flower!
- Next I figure out how many will fit on a sheet of whatever kind of cardstock I am using so I can print full sheets. You don’t have to do this if you are only making a few of these adorable paper sunflowers. Copy and paste the pieces you need to fill your sheets and you will be ready to go! If you are making garlands you will need to cut enough flowers to fill out the length of your garland. I used 10 per garland at about 10 feet of total length, so one for every 12 inches.
- Now you are ready to cut. I set this up on two different computers and two different machines. I cut the petals with one machine (my Cricut Explore Air 2) and I cut the middles and circles we used to attach them to the twine with my other machine (Cricut Maker). This was just to make it faster for me, you can cut them all with one machine!
- Cut out all of your pieces while your hot glue gun heats up and get ready to start making flowers…it’s a lot of gluing if you are making a lot of these garlands but it goes quickly so fear not! I made 5 total garlands with 50 flowers, it took several hours.
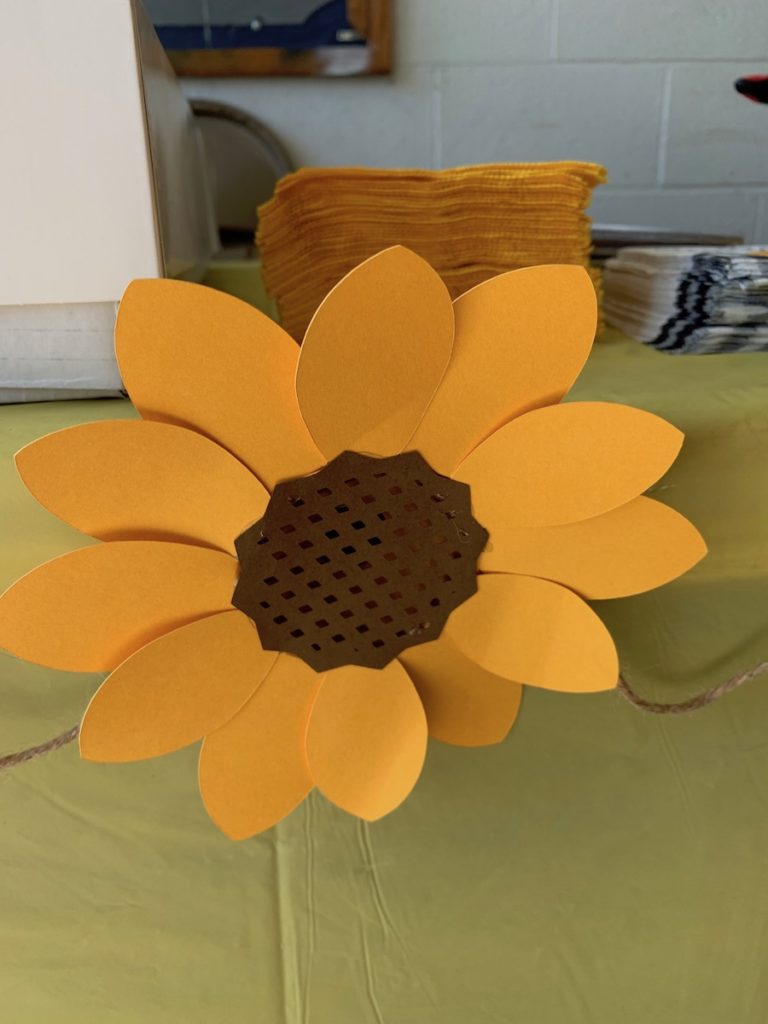
- To assemble the flowers place a dab of hot glue on the tab of each petal piece, the little square at the end of the circle. Attach it to the other side to close the gap and form a complete circle. Do this for all petal sections and keep them grouped in sets of two, one large and one smaller.
- Next, glue the smaller set of petals inside of the larger set once they are both connected and circular.
- Put some hot glue around the open middle or center (near the petals) and place your middle section in place. Be careful not to use too much glue or it will push through the tiny “seed” openings!
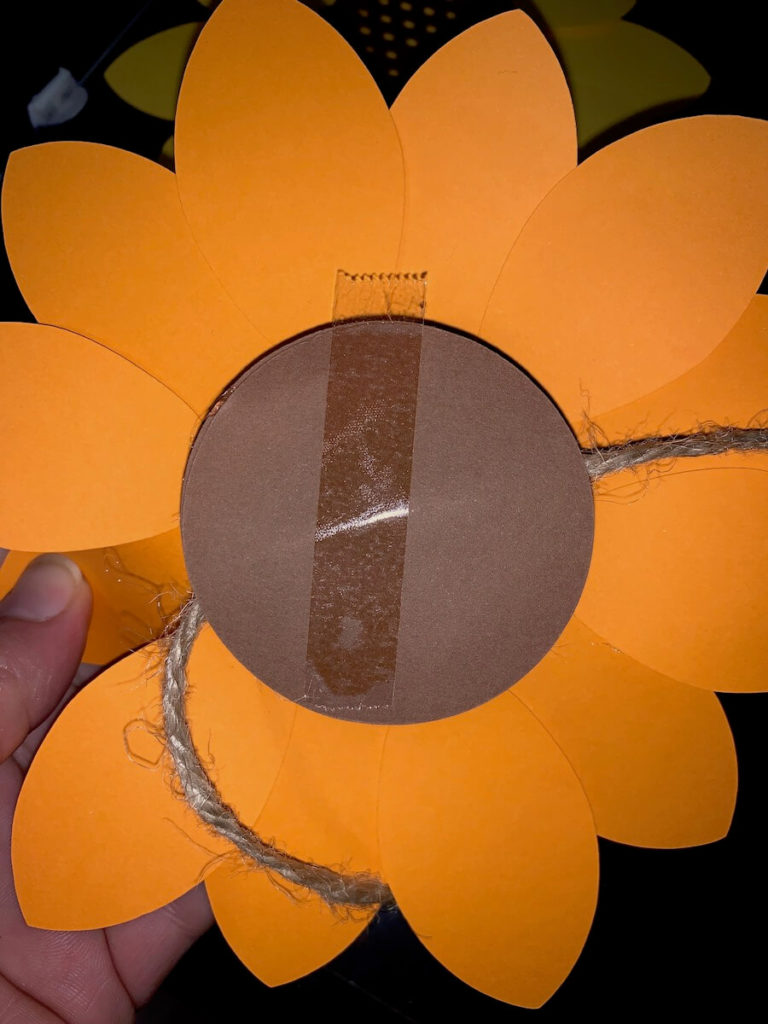
- Finally, glue one of the circles we added to the back side of your sunflower by putting glue around the edge of the opening and placing it against one of your circles, roughly in the middle…it doesn’t need to be perfect you won’t see this bit it is only used to attach the flowers to twine or ribbon to form the garlands!
- Now we can attach our Cricut sunflowers to the twine, ribbon, or string. We put our sunflowers on in a kind of pattern. It’s easier if you stretch out your twine and hang it or have someone hold it up. I just put thumbtacks into the wall and attached each side so there was room to work.
- We attached the outer most sunflowers first, then found the middle, then three on each side. You can make yours however you want depending on the number of different colors you choose to make and the length of your garlands. Starting from the outside, then the middle, then filling in the spaces means you don’t have to keep doing any measurements. If you are laying out your twine and attaching them on a table you can just measure every 12 inches and place a flower!
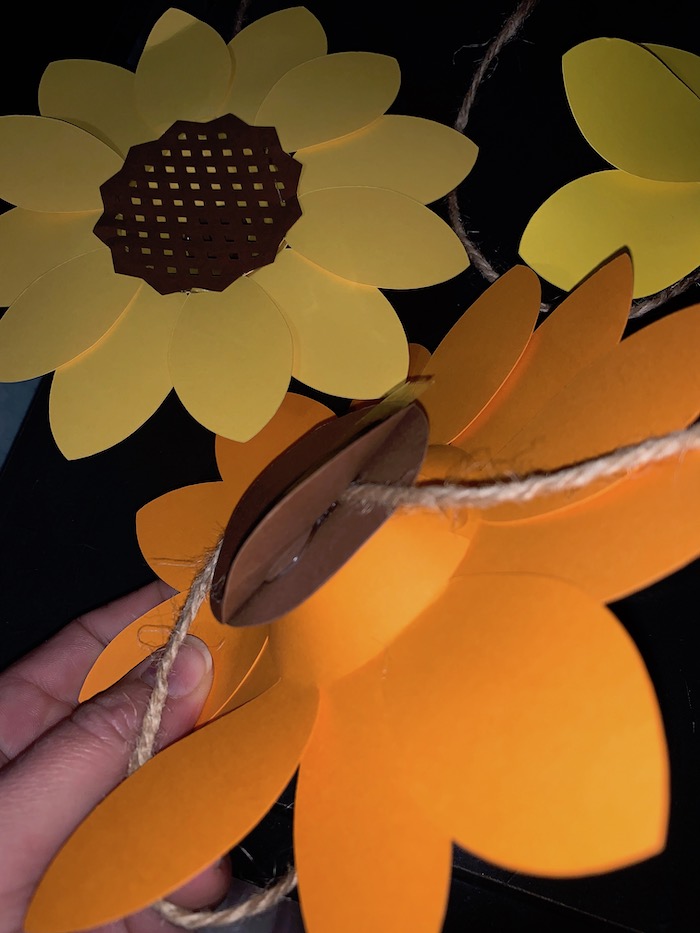
- To attach the flowers to the twine or ribbon you just use the second circle you cut for each flower to pinch the circles together with hot glue in the middle so they have a little more substance to hold them onto the twine.
- If you want your sunflowers to have more depth you can curl the leaves back, flatten them out a bit and bend the petals to add some pizazz! We mostly left ours straight because there was a LOT to do and not a ton of time to do it :)
Here are some photos to walk you through the assembly process:
Here’s how you set up your Design Space screen, note that the petal parts are automatically one large and one slightly smaller. If you resize them as a group you won’t have any problems keeping them in proportion!
See how we put the sunflowers together. It’s a little different from the way the tutorial goes for making these as a bouquet from the site that designed the sunflower SVG. You’ll notice that circle also makes a great place to add some doubled sided tape to attach your sunflower garland to whatever surface you want!
Here’s how we attached them to the twine with the additional circle
Here is what they looked like all finished!
Are you looking for more Cricut crafting posts?
We have got you covered If you are looking for more Cricut crafting posts. Here we have everything from tutorials and crafts, to free svg files, and more! Check them all out below:
- Cricut Design Space Tutorial
- How to Center Text on a Cricut Project
- What Is A Reverse Canvas | A Cricut Tutorial
- Cricut Projects | Which Vinyl To Use
- Main Street Electrical Parade Shirt
- How to Make Cricut Paper Flowers
- Cricut Text in Shape Tutorial
- How to Slice in Cricut
- Gorgeous DIY Yoga Shirt + Free Zen AF SVG!


Did you love this recipe?
Make sure to comment below so we can chat about it!