

This site contains affiliate links. Please see Policies for more information.
When it comes to Cricut crafts one of the biggest problems is keeping your designs straight! Getting to that final step and having your project ruined can be frustrating! Here are some tips for how to center text on a Cricut project.
How to Center Text on a Cricut Project
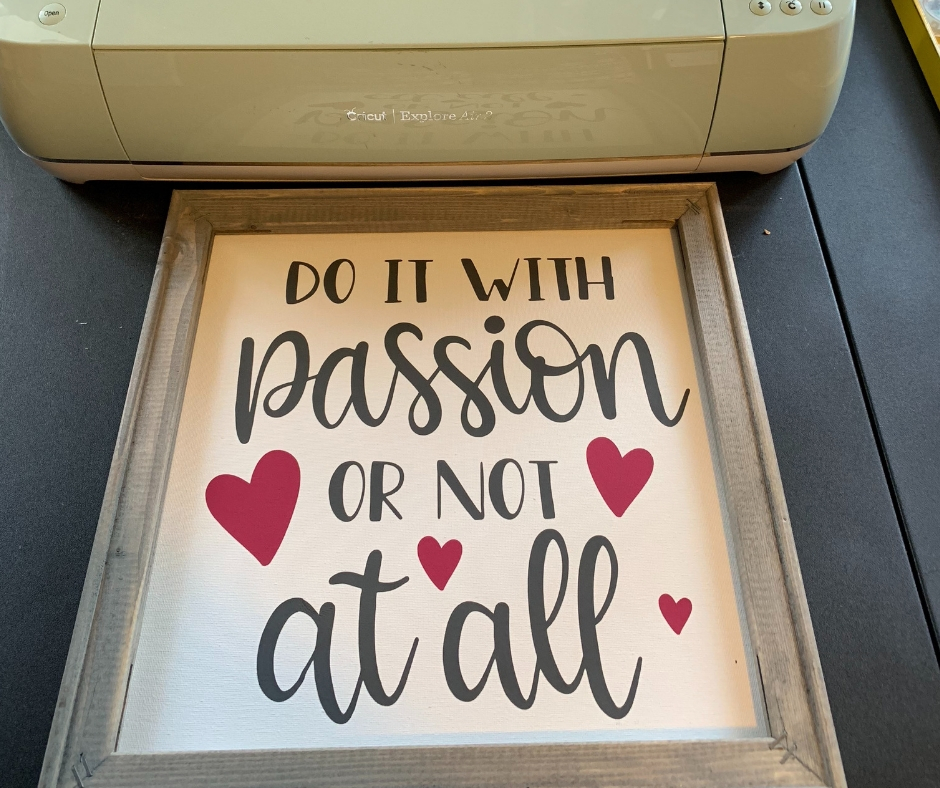
We’ve all been there, especially in the beginning, the hard work is done. We’ve created a design, cut, weeded, and transferred to perfection and then when we stick it on the mug / sign / cup / shirt it looks…off. Well stress no more! You don’t have to waste materials, time, or sanity on keeping designs straight for your Cricut crafts. These tips will help you see how you can easily and efficiently create perfectly straight designs every time.
Use your fingers!
This one is easy. If you are making shirts or designs that use heat transfer vinyl sometimes the easiest thing you can do is use your fingers. When you are working with shirt seams, and fabric that moves it can be tough to really get in there with a ruler or a tape measure. Use your fingers to get the design in the right spot!
Pro Tip: typically you want a design three fingers down from the neck for the front design!
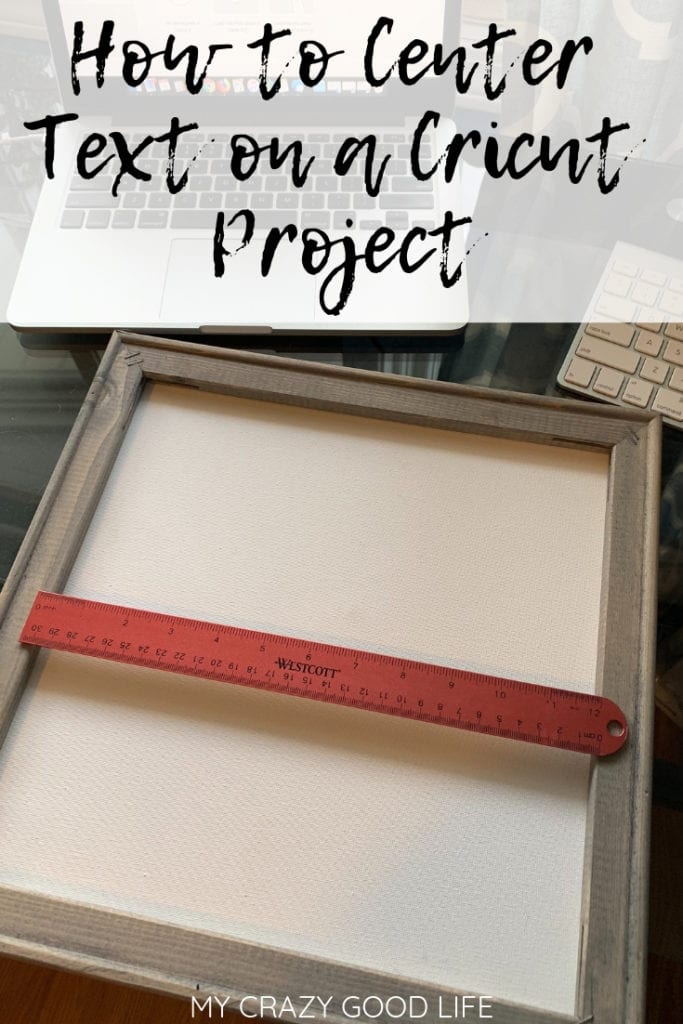
A ruler works wonders!
They make these awesome rulers with a zero in the middle, it makes for quick work of centering projects on your design. You can also use a ruler with centimeters on one side, the smaller increments make it easier to see if you’re on the right track..and let’s face it, the metric system is way more efficient anyway!
Bring on the lasers!
If you really want to get precise you can use a fancy device like this that has lasers which shine and create a crosshairs effect. This will make it easy for you to see where you need to place your designs so that you can center text on your Cricut projects.
Gridded transfer tape
Using transfer tape with a grid can really help make life easier as well. It’s a little bit more expensive in some cases than just regular old contact paper but it works better AND it makes life easier…it’s worth it in my book! When it comes to finding ways to center text on a Cricut project I almost always reach for transfer tape with grid lines. It will help you keep everything nice and straight and centered on your item!
A measuring tape works too!
The handy dandy measuring tape will work wonders for centering text on your Cricut projects. Sure, it’s old school and there’s no flashy laser involved but hey, tried and true works great sometimes! Use a fabric version like this when working with heat transfer vinyl on shirts, clothing, bags, and more.
Notes / Helpful Tips
- Take full advantage of the center text feature in design space for Cricut projects. You can highlight everything and center it horizontally or vertically depending on what you are making even if it’s not all the same shape, font, design, etc. Then it’ll be centered as it’s cutting!
- When working with shirts it can be helpful to fold them in half and iron a crease in the front or back so you can see your center line without having to mark the fabric itself.
- Remember that when working with vinyl if you have to scrape it off and start over, it’s not the end of the world! You don’t have to throw away your project, in most cases if you get that vinyl off before it cures (which can take 72 hours) you’ll be able to recut and put a new design on there!
- Add a flourish or shape to event things out! Okay, you’ve made a mistake and now your design is not centered or balanced…add a flourish of some kind of balance things out. If you really don’t have the patience to start again you can work wonders with this method ;)
Do you have other Cricut posts I can check out?
- Cricut Projects | Which Vinyl To Use
- What Is A Reverse Canvas | A Cricut Tutorial
- Cricut Welcome Sign | DIY Plant Hanger
- Main Street Electrical Parade Shirt | Cricut Project
- How to Make Cricut Paper Flowers | Cricut Paper Crafts
- Cricut Text in Shape Tutorial
- How to Slice in Cricut | How to Slice in Design Space


Did you love this recipe?
Make sure to comment below so we can chat about it!