

This site contains affiliate links. Please see Policies for more information.
Did you know that you can use the Cricut to design text into shapes? There is a really simple and easy solution for turning bubble text into whatever shape you can imagine! Today I’m sharing with you a great, east to follow, Cricut text in shape tutorial.
This whole process can be completed in Cricut Design Space. No need for outside software or tweaking before you upload. From start to finish we will be working in Design Space to make these Cricut text in shape designs. Don’t be afraid to think outside of the box on these…You can use this process to make your own text shapes for holidays, parties, gifts, and more.
We are going to slice in this tutorial. If you’re not familiar with that function just yet, check out this easy to follow guide on how to slice in Cricut Design Space.
Cricut Text in Shape Tutorial:
You won’t need anything super special for this tutorial. You can print or cut these designs on almost any medium using the Cricut. I personally love using this method to make names and text for cups and travel mugs. Use an apple shape and you’re well on your way to the perfect teacher gift!
Supplies Needed for Making Cricut Text in Shape Designs:
Cricut or other cutting machine
Cutting Mats
Weeding Tools
Vinyl, Cardstock, Paper, or Other Cutting Medium
Directions for Making Cricut Text in Shape Designs:
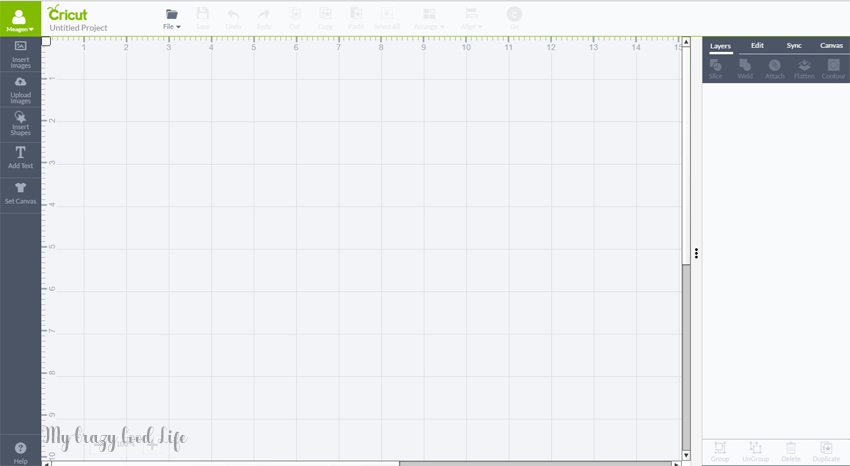
Open a New Project in Cricut Design Space.
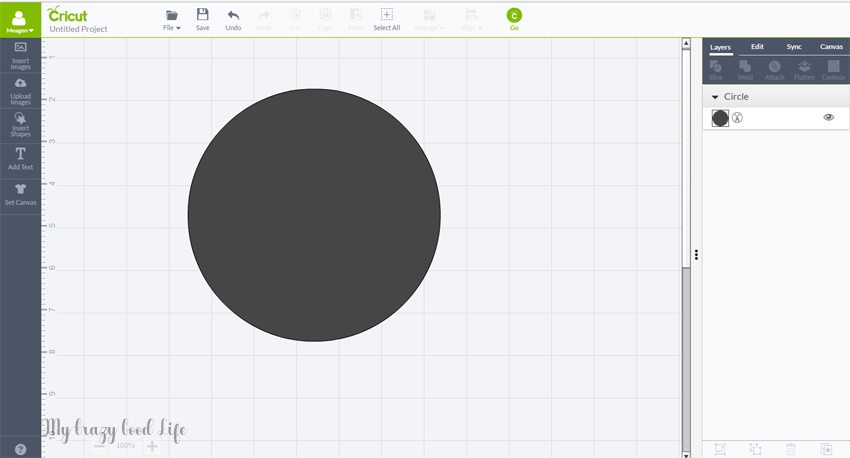
Insert image ~ I picked a circle but you could use any image you would like (the less amount of layers the easier)
Add Text ~ You will want to use a chunky type text. You can use a text from your computer or from Cricut Access. I used Copper Black from my computer.
Highlight your shape. Right Click and Ungroup your shape (only necessary if there is more than one layer).
If you have multiple layers you will want to separate your layers and only work with the one that you want to turn into text.
Drag the corner of your shape layer to make the shape a bit larger to work with.
Move your shape to the front or back, whichever is easier for you to work with.
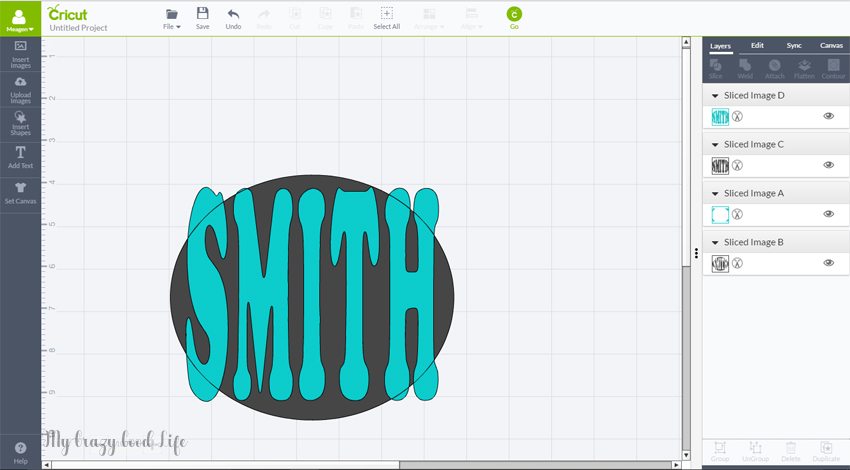
Drag your Text to fill out your Shape.

On the Text image, click the Unlock button so you can drag and alter the text. You may need to make the Letter Spacing a bit closer together as well. You can do this by lowering the number on the right hand side. Play around with it until you get the look you’re going for. Remember there is an undo button at the top if you do not like a particular step.
Highlight your Shape and Text and at the top right hand side under Layers, click Slice.
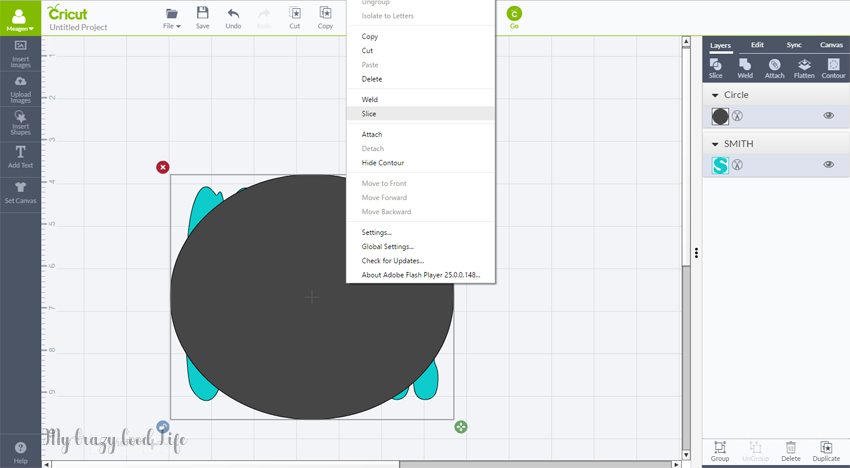
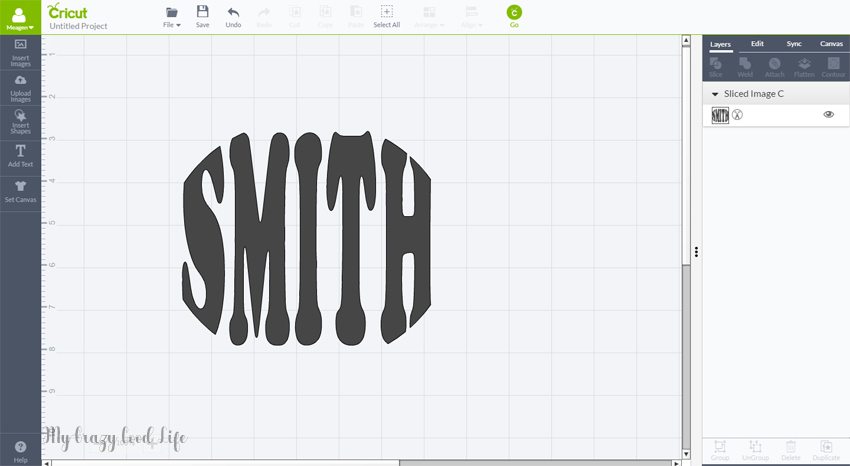
Click and drag the Layers apart, keep the Text/Shape layer and you can delete the rest.
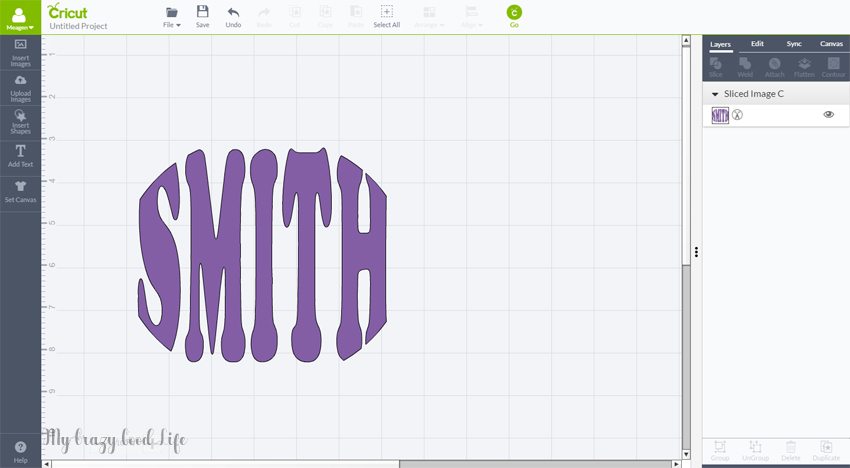
YAY you now have a finished product.
Add some color if you are adding other layers and you are all set to cut!


Thank you! Great tutorial and exactly what I was looking for!
Thanks for leaving a comment! I’m so glad this was helpful!
Very cool, thank you for taking the time to share.
Thank you another great tutorial. Can’t wait to see what you are doing next.
Beca
Thank you!!