

This site contains affiliate links. Please see Policies for more information.
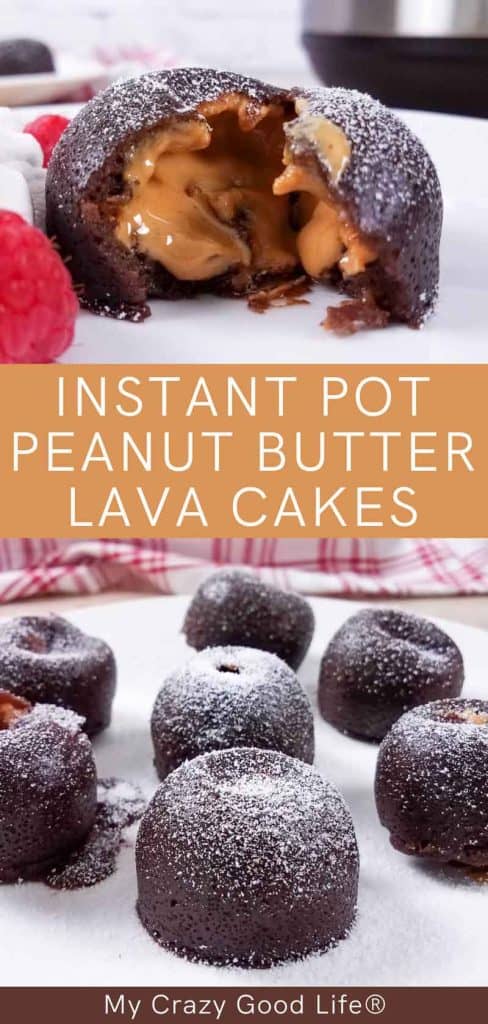
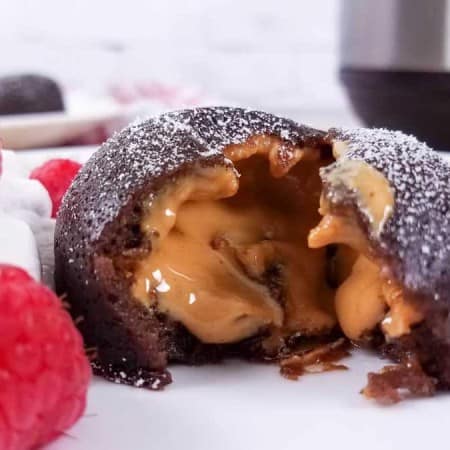
This delicious Instant Pot Peanut Butter Lava Cake recipe is for mini lava cakes that are filled with peanut butter instead of chocolate. This healthier dessert is made with honey, dark chocolate chips, and brown rice flour.
These lava cakes are so easy to make in the Instant Pot, and will be a new favorite dessert with your family and friends. It’s the perfect dessert for any peanut butter fan, as well as when chocolate cravings strike but you want to stay away from highly processed foods.
Instant Pot Chocolate Lava Cake is great for Valentine’s day or date night. But you don’t have to wait for special occasions to make this delicious dessert. The best part about this recipe is that it’s a quick dessert with a rich chocolate flavor, but it’s made with basic ingredients that you won’t feel bad about eating on a typical weeknight.
Where’s the Recipe?
We have readers of all comfort levels in the kitchen here at My Crazy Good Life. Because of that, we want to be sure that our recipes are easy for anyone to understand.
In this article you will find lots of helpful information about ingredients, as well as detailed cooking instructions, recipe tips, and healthy eating plan calculations. If you’re confident in the kitchen and want to get straight to cooking, simply scroll to the bottom of the page where you’ll find the recipe card for this delicious chocolate lava cake!
Ingredients in Instant Pot Peanut Butter Lava Cake
- Butter: I use butter or ghee.
- Dark chocolate: I use dark chocolate because it has less sugar than semi sweet. If you’re not concerned about the sugar content, semi-sweet chocolate chips would work as well.
- Eggs
- Coconut milk: almond milk would also work.
- Brown rice flour: to make this sweet treat gluten free, I use brown rice flour. If you don’t have any restrictions with wheat, you can use whole wheat flour if you’d like.
- Salt
- Honey: honey is one of my favorite natural sweeteners. Maple syrup would also work.
- Baking powder
- Cocoa powder
- Peanut butter: I buy peanut butter where peanuts and salt are the only ingredients. Look for peanut butter without any added oil or sugar.
- Optional toppings: Coconut whipped cream, Stevia, Raspberries
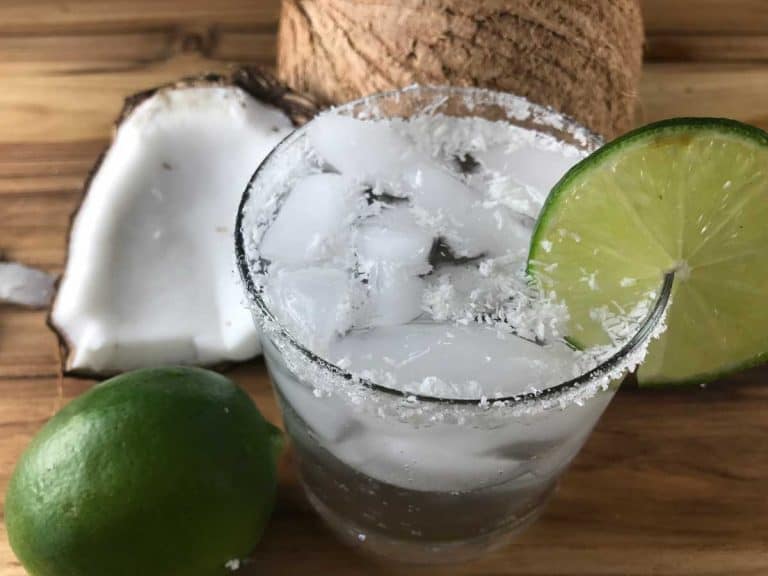
Ingredients for Coconut Whipped Cream
- Coconut milk: you want to get the canned stuff. Where there’s thick coconut cream and milk.
- Stevia: the stevia is optional and depends on how sweet you want your whipped cream.
How to Make Instant Pot Peanut Butter Lava Cake
Pro tip: the cooking time might have to be adjusted next time you make these, so take notes on how they come out!
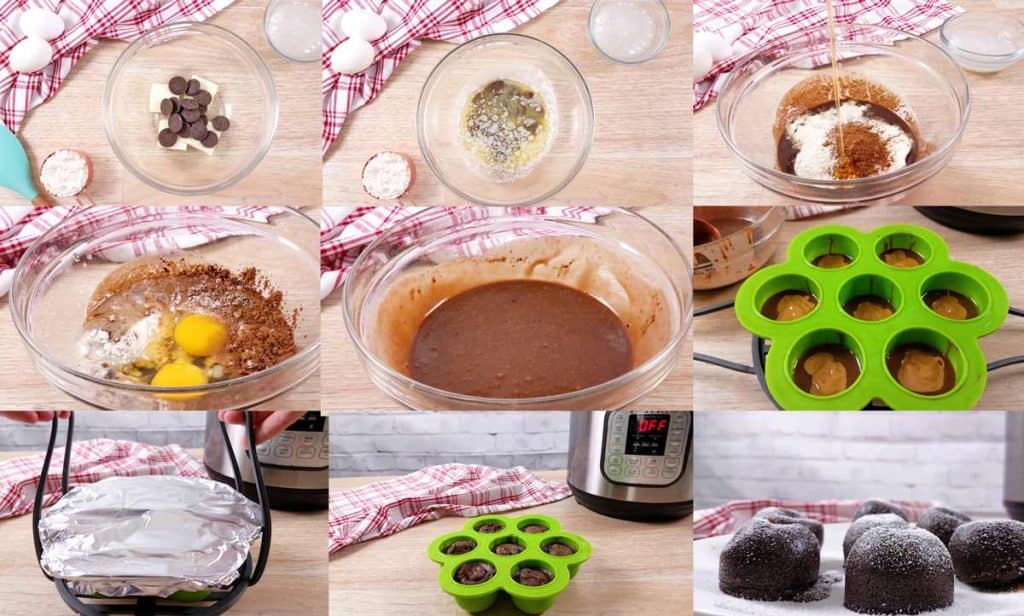
- In a small or medium microwave-safe bowl, add the butter and dark chocolate. Melt the butter and chocolate together in the microwave for about 1 minute, stirring halfway through the cook time.
- When the butter and chocolate have melted, use an electric mixer to combine the two until smooth.
- Next add the eggs, coconut milk, brown rice flour, salt, honey, baking powder, and cocoa powder (everything except the peanut butter) to your mixing bowl. Mix the batter until it is smooth.
- Lightly spray each cup of your silicone egg bite mold with non-stick spray. Then fill each cup halfway with batter.
- Add a teaspoon of peanut butter to the center of each cup, and then fill the cups with the remaining cake mix. Each cup should be 3/4 of the way full.
- Cover the silicone mold with foil and place the mold on a trivet.
- Add 1 cup of water to the bottom of the Instant Pot insert, then slowly lower the lava cakes, using the trivet handles, to the bottom of the Instant Pot.
- Close the lid and turn the pressure valve to Sealing. Cook the molten cake on high pressure using the Manual or Pressure Cook button for 5 minutes.
- As soon as the cook time is done, quick release the pressure and remove the lava cakes from the Instant Pot. Manually releasing the pressure means that you move the pressure valve from Sealing to Venting with your finger or the end of a wooden spoon. Steam will immediately release out of the valve.
- While the cakes are still hot, remove the foil and carefully run a spoon around the edge of each cup to loosen the cakes.
- Place a plate over the top of the lava cakes and then flip them upside down to remove the cakes.
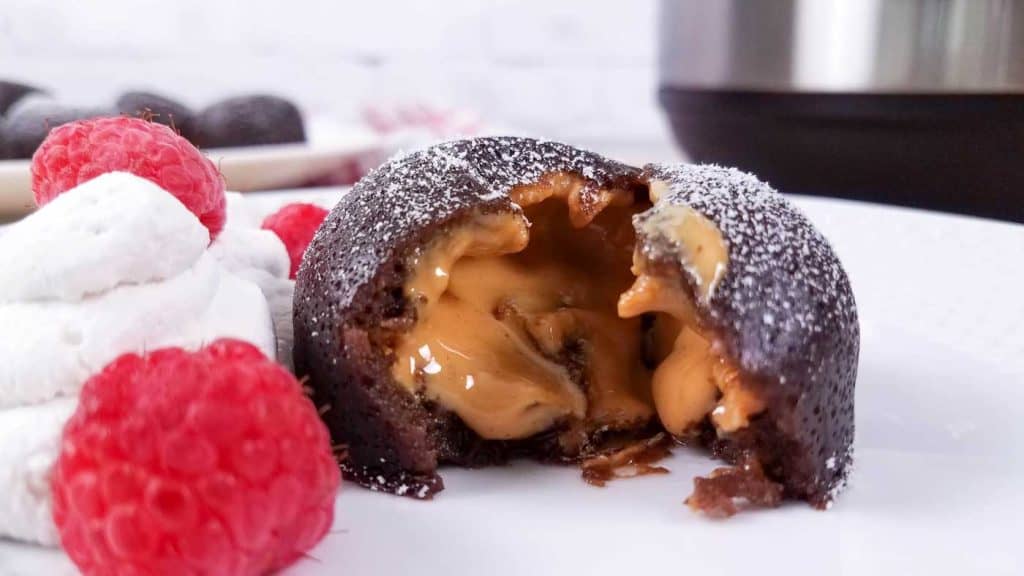
- Sprinkle with powdered stevia (optional) and serve immediately with a side of coconut whipped cream and raspberries.
How to Make Coconut Whipped Cream
Pro tip: Stick your can of coconut cream in the fridge as soon as you get home from the store so you can use it for this whipped cream recipe!
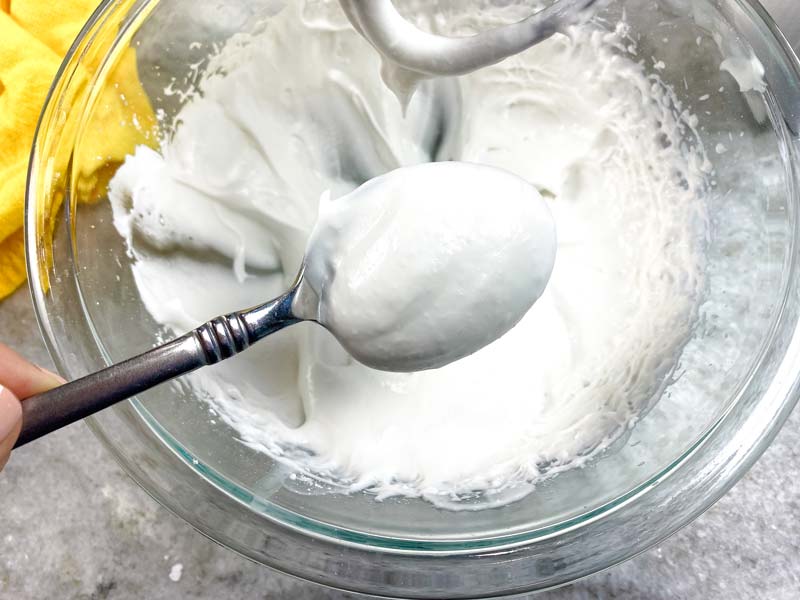
- Open the can of coconut cream and separate the milk from the cream. The cream should be hard and the milk watery.
- Place the cream in a chilled bowl, and then add the Stevia.
- Whip the coconut cream with a hand mixer for 1-2 minutes until the coconut cream is soft and has a whipped cream like texture.
- Store in the fridge until ready to use, but use the same day. The coconut whipped cream will not keep in the fridge for longer than a day.
- I love this whipped cream dispenser for my homemade whipped cream–it’s so easy to use and I love the way it looks (especially when company comes over!). The presentation of a dessert isn’t super important to me, but I feel like this whipped cream dispenser is easy and fun to use. You could easily make raspberry whipped cream or a different flavor–key lime is so delicious.
- Check out this post for more detailed instructions on how to make coconut whipped cream.
Ideally, these cakes will pop out of the molds fully intact and have a perfect peanut butter lava center. This doesn’t always happen, and to be honest it takes a little bit of practice and getting to know your pot. Here are some tips that I have learned along the way.
Recipe Tips
- I highly recommend making these before serving them to company to make sure your cooking times are perfect, as some Instant Pots cook differently. If it’s your first time making these it might be stressful to do with a dinner party going on. Want to get it perfect, but don’t have time to troubleshoot? Use a small Reese’s Peanut Butter Cup in the middle instead of real peanut butter.
- As you can see in my pictures, it’s tricky to get the lava cakes all to turn out perfect. Lots of spray oil helps (I usually use coconut oil spray), as does not waiting for them to cool before you remove them from the molds.
- I like to make these while we are eating dinner. Even if one breaks, a broken chocolate cake looks much more beautiful when it’s right out of the pressure cooker and still warm.
- Looking for other options to top these with? Try powdered sugar, caramel sauce, melted chocolate sauce, a scoop of vanilla ice cream, or even creamy peanut butter.
Troubleshooting Tips
If your Instant Pot lava cakes are too gooey or look as if they’re overcooked, it could be because of several reasons:
- If your lava cakes are too gooey, you should cook them for a minute longer next time you make them. Right now, put the cakes back into the pot and close the lid for 1-2 minutes. Don’t turn the pot on–it should still come to pressure quickly and finish cooking your lava cakes.
- If your lava cakes are overcooked, pull them out of the molds as soon as you can and eat them immediately. Five minutes in the pressure cooker was the perfect time for my cakes, so I don’t think you’ll have this problem. If this is an issue, reduce the cook time by one minute next time you make them. Remember, each pot is slightly different, and elevation plays a part in this too.
Healthy Eating Plans
21 Day Fix / Portion Fix
- One cake is considered a treat swap on the Fix.
Weight Watchers
- Each cake (without toppings) is 7 Points on the 2023 Plan | 8 Blue Plan Points | 8 Green Plan Points | 8 Purple Plan Points – using unsweetened plain almond milk and whole wheat flour instead of brown rice flour.
2B Mindset
- One cake is considered a silly carb–track it and see.
More healthy Instant Pot recipes made in egg bite molds
- Starbucks Egg Bites
- Mini Meatloaf
- Teriyaki Meatballs
- Key Lime Custard Bites
- Egg White Bites
- Lasagna Stacks
- Dairy Free Egg Bites
Instant Pot Peanut Butter Lava Cake
Equipment
- Instant Pot 6 qt
- Egg Bite Molds
- Sealing Rings
Ingredients
- 4 tbsp butter or ghee
- ¼ cup dark chocolate chips pieces
- 2 eggs
- 4 tbsp coconut milk or almond milk
- ⅓ cup brown rice flour or whole wheat flour
- ¼ tsp salt
- 1 tbsp honey
- ½ tsp baking powder
- 1 tbsp cocoa powder
- 7 tsp peanut butter 1 tsp per lava cake
Optional toppings:
- Stevia powdered
- coconut whipped cream
- raspberries
Ingredients for coconut whipped cream:
- 1 can coconut milk canned, refrigerated so that it is cold
- 1 tsp Stevia optional
Instructions
- In a medium microwave-safe bowl, combine butter and dark chocolate (you can use semi sweet if you're not concerned about the extra sugar). Melt the butter and chocolate in the microwave in 30 second increments until the butter and chocolate are melted (stir to see if they're melting). This will take about 1 minute. 4 tbsp butter, 1/4 cup dark chocolate chips
- Using a bowl, mix together butter and chocolate with an electric mixer.
- Add eggs, coconut milk, brown rice flour (you could also use whole wheat flour), salt, honey, baking powder, and cocoa powder (everything except the peanut butter). Mix the batter until smooth. 2 eggs, 4 tbsp coconut milk, 1/3 cup brown rice flour, 1/4 tsp salt, 1 tbsp honey, 1/2 tsp baking powder, 1 tbsp cocoa powder
- Lightly spray each cup of your silicone egg bite mold with non-stick spray. Once the cups are greased, fill each cup halfway with batter.
- Add a teaspoon of peanut butter to the center of each cup, then fill the cups with the remaining cake mix. Each cup should be 3/4 of the way full. 7 tsp peanut butter
- Cover the silicone mold with foil and place the mold on a trivet.
- Add 1 cup water to the bottom of the Instant Pot insert. Place trivet at the bottom of the pot using the handles to slowly lower the lava cakes into the Instant Pot.
- Close the lid and turn the pressure valve to Sealing. Cook the lava cakes on high pressure using the Manual or Pressure Cook button for 5 minutes. (the cooking time might have to be adjusted next time you make these, so take notes on how they come out!)
- As soon as the Instant Pot beeps that the timer is done, quick release the pressure and remove the lava cakes from the Instant Pot. Manually releasing the pressure means that you move the pressure valve from Sealing to Venting with your finger or the end of a wooden spoon. Steam will immediately release out of the valve.
- While the cakes are still hot, remove the foil and carefully run a spoon around the edge of each cup to loosen the cakes.
- Place a plate over the top of the lava cakes and then flip them upside down to remove the cakes.
- Sprinkle with powdered stevia (optional) and serve immediately with a side of coconut whipped cream and raspberries. Stevia, coconut whipped cream, raspberries
Coconut Whipped Cream Directions:
- Open the can of coconut cream and separate the milk from the cream. The cream should be hard and the milk watery. 1 can coconut milk
- Place the cream in a chilled bowl. Add the Stevia. 1 tsp Stevia
- Whip the coconut cream with a hand mixer for 1-2 minutes until the coconut cream is soft and has a whipped cream like texture.
- Store in the fridge until ready to use, but use the same day. The coconut whipped cream will not keep in the fridge for longer than a day.
Video
Notes
- I highly recommend making these before serving them to company to make sure your cooking times are perfect, as some Instant Pots cook differently. If it’s your first time making these it might be stressful to do with a dinner party going on. Want to get it perfect, but don’t have time to troubleshoot? Use a small Reese’s Peanut Butter Cup in the middle instead of real peanut butter :)
- Looking for other options to top these with? Try powdered sugar, caramel sauce, melted chocolate sauce, a scoop of vanilla ice cream, or even creamy peanut butter.
- As you can see in my pictures, it’s tricky to get the lava cakes all to turn out perfect. Lots of spray oil helps (I usually use coconut oil spray), as does not waiting for them to cool before you remove them from the molds.
- I like to make these while we are eating dinner. Even if one breaks, a broken chocolate cake looks much more beautiful when it’s right out of the pressure cooker and still warm.
- If your lava cakes are too gooey, you should cook them for a minute longer next time you make them. Right now, put the cakes back into the pot and close the lid for 1-2 minutes. Don’t turn the pot on–it should still come to pressure quickly and finish cooking your lava cakes.
- If your lava cakes are overcooked, pull them out of the molds as soon as you can and eat them immediately. Five minutes in the pressure cooker was perfect for my cakes, so I don’t think you’ll have this problem. If this is an issue, reduce the cook time by one minute next time you make them. Remember, each pot is slightly different, and elevation plays a part in this too.
- One cake is considered a treat swap on the Fix.
- Each cake (without toppings) is 7 Points on the 2023 Plan | 8 Blue Plan Points | 8 Green Plan Points | 8 Purple Plan Points – using unsweetened plain almond milk and whole wheat flour instead of brown rice flour.
- One cake is considered a silly carb–track it and see.
Nutrition
Make This Recipe?
Make sure to follow on Pinterest @bludlum and on Instagram @beccaludlum


I am so in love with these cakes! Delicious!!!
is it 215 calories for one bite or two?
If you make 7 bites, it’s 215 for one.
I am in love with this recipe! Thank you for such an awesome (and healthy!) treat for my family.
I need to start making more desserts in my Instant Pot, and this looks like the perfect recipe to start with! Thanks so much for sharing!
Those look crazy delicious! Thanks so much for sharing!
Hi, my daughter has a peanut allergy. Do you think sun butter would work?
Thanks,
Kara
Yes!
Do you think almond milk would work instead of coconut?
Yes!
I just made this keto by using coconut flour, Lilly’s dark chocolate chips, sugar free all natural PB, as well as Walden farms maple syrup instead of honey. They came out AMAZZZZZZING
Did you use the same amount of coconut flour? I have whole wheat and Coconut(which I’d like to try) but I don’t have brown rice flour, I also have blanched super fine almond flour… I might just go ahead and try it, but if you see this please let me know ;) Thanks!
I’d use whole wheat in place of brown rice! :)
I went ahead and used the coconut flour, I used the same amount, and the batter seemed a little dry so I added an extra tbsp of coconut milk. I also used Erythritol instead of honey to make it less calorie dense. They turned out GREAT!! Thanks! Really enjoyed the little lava cakes.
Can I use whole wheat flour instead?
That should be fine!
How long and at what temp would they go in the oven?
I haven’t made these in the oven yet!
Did you eventually try them in the oven? I’d like to know too as I don’t own an Instant Pot.
I don’t have an Instant Pot. How long would I bake them in the oven, and at 350 degrees?
Hi Bonnie! I’ve never made these in the oven, but I’d test them at 350 degrees, checking after 10 minutes or so. I’d rely more on what the top looks like to see when they’re done instead of sticking a toothpick in them, as you want the center to be gooey :)
Love your recipes…
Thank you Carolyn! <3
Cooking these for 5 minutes did essentially nothing to mine… they were still completely gooey. I’m on my 4th repressurizing and recooking attempt… I did double the recipe and stacked two molds on top of each other, but I’m going on cooking these suckers for half an hour… did I do something wrong?
Cooking two trays instead of one can cause a bit of an issue. I think that’s it :-/ It takes a long time for two trays to cook through.
I don’t have some of these ingredients. Think I could use regular milk and flour?
Regular flour would be ok, I haven’t tried them with regular milk but I’d assume it’s ok too!