

This site contains affiliate links. Please see Policies for more information.
This is a sponsored post written by me on behalf of Cricut. All opinions are 100% mine.
The Cricut Joy is the latest addition to the Cricut family of crafting machines. I’m loving mine, today I’m walking you through how to make Cricut Joy Labels! I’m also sharing 3 little things to make with Cricut Joy!
What is a Cricut Joy?
This is one of those exciting days when I get to head into my craft room and experiment with something new.
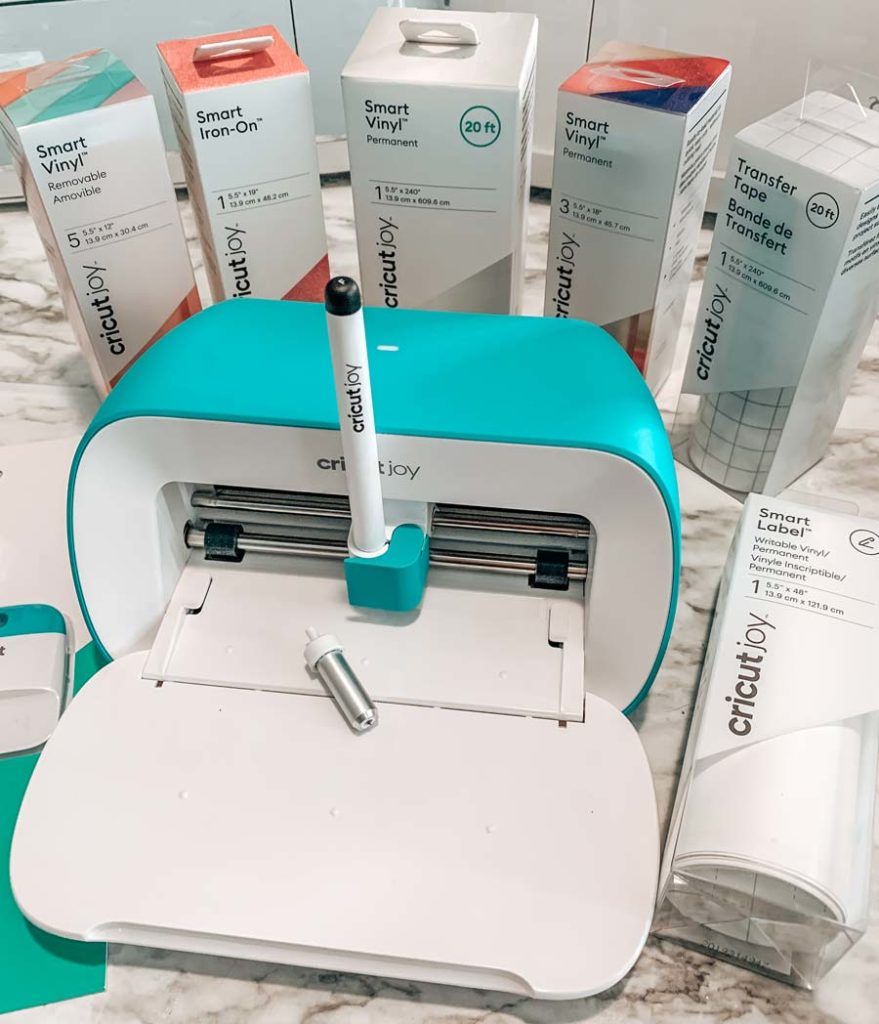
The Cricut Joy is the newest, most compact and portable cutting machine ever. It’s nicknamed your DIY Best Friend for good reason!
While it looks great in a cubby or on the counter top, the best thing about Cricut Joy is that it’s portable! Here are a few things I love about my Cricut Joy:
Cricut Joy Card Mats
You don’t have to travel with mats…that’s right, thanks to the all new full suit of “smart” materials you can use your Cricut Joy anywhere, anytime, without mats!
Of course, you still have the option of using cutting mats. And the speciality card mat even makes it possible to cut already folded materials for custom cards in the blink of an eye.
The card mat works with Cricut Joy exclusive blank insert card sets. These cards sets allow you to make and customize cards at a moment’s notice. No need to run to the store or spend a fortune on cards, now you can make a custom card from tons of gorgeous designs in just a few moments.
Writing with the Cricut Joy
As you’ll see below, the Cricut Joy also writes! You don’t have to switch to your bigger machines like the Cricut Explore Air 2 or the Cricut Maker to work with pens.
The Cricut Joy has it’s own line of compatible pens in a variety of weights, styles, and colors (they even have Infusible Ink pens for the Joy!) so you can customize any project even further!
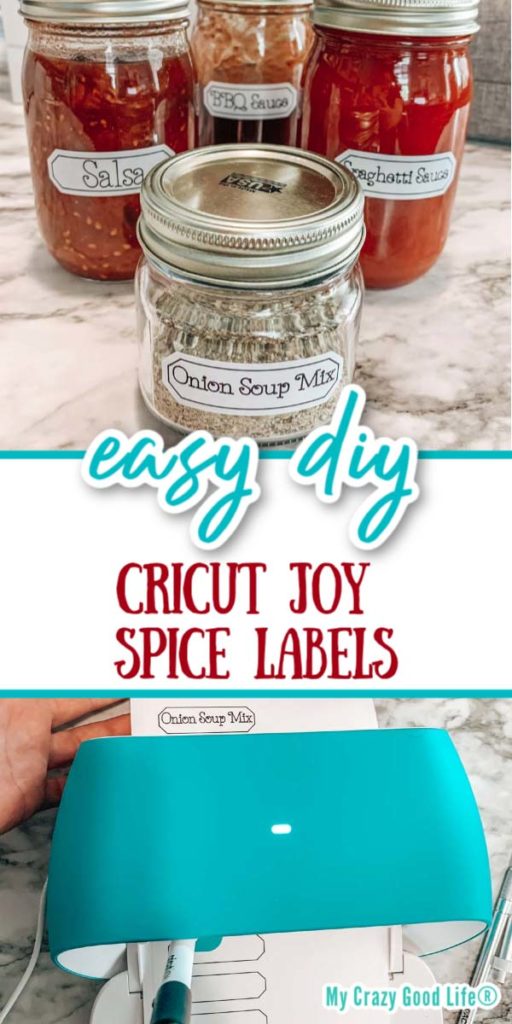
You may or may not know that I’m all about making homemade staples. Things like onion soup mix, enchilada sauce, spaghetti sauce, and even a low carb BBQ sauce…You can find all my other favorite pantry staple recipes here.
Organize The Fridge And Pantry With Cricut Joy Labels
Today we’re putting a stop to the madness and organizing like a champ with the Cricut Joy. My spice cabinet and pantry are difficult places for me to keep organized, so I loved the idea of making pantry labels!
Thanks to Design Space I’m making these labels so quickly–and they’re easy too! I’m going to show you how to customize a project from Design Space to make it your own and make it work for what you need. The Cricut Joy will do the hard work and you’ll have your labels within minutes!
We’re going to be working with the Smart Label Writable Vinyl and the Cricut Joy Black Pen. This stuff is amazing and thanks to the Cricut Joy we don’t even need a mat!
How to make Cricut Joy Spice Labels:
Time needed: 15 minutes.
How to make Cricut Smart Labels with the Cricut Joy.
- Open Design Space
First, open Cricut Design Space and switch our Machine Setting to Joy.
You’ll need to set up your machine and link it to your account first. Then I just did a simple search in Projects for “Labels,” then I found the one I liked and clicked “Customize”.

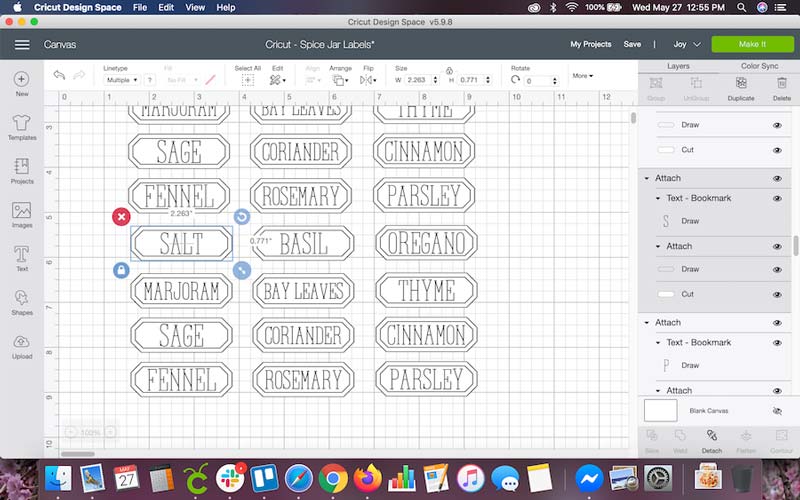
- Detach Labels
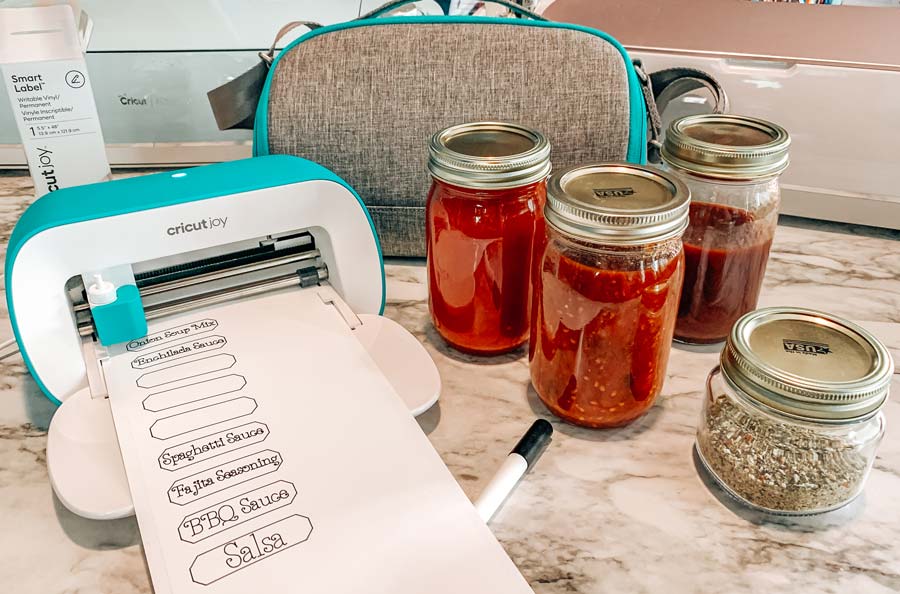
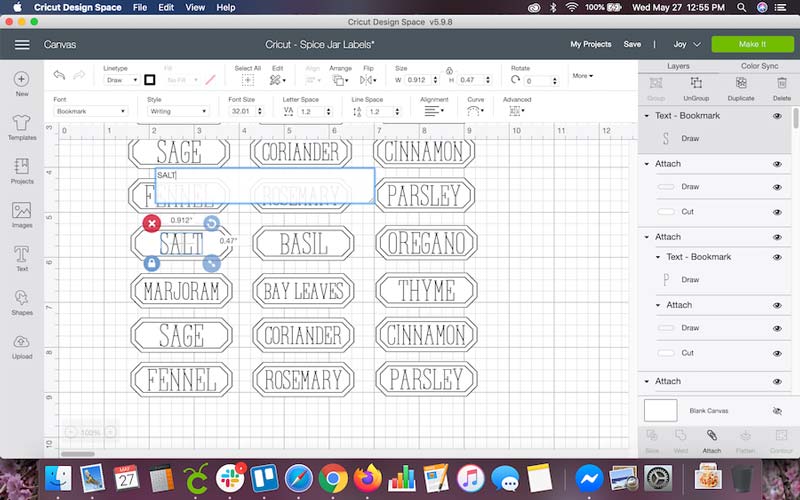
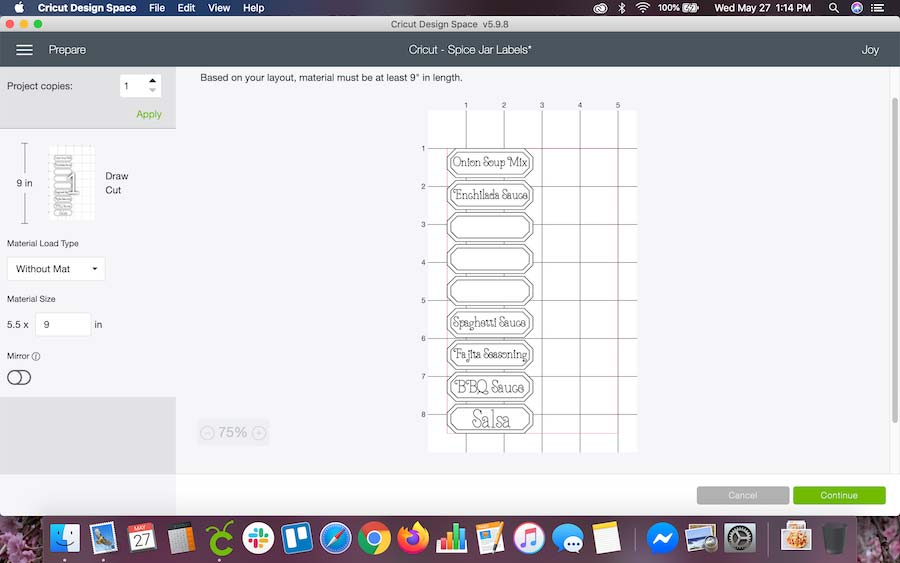
The first thing we will do is detach the label and the writing. I’m going to switch to a different writing font. You can use whatever writing font you like!
After all of your labels are detached, you can switch out the writing and resize the wording to fit into the labels.
- Need some blank labels?
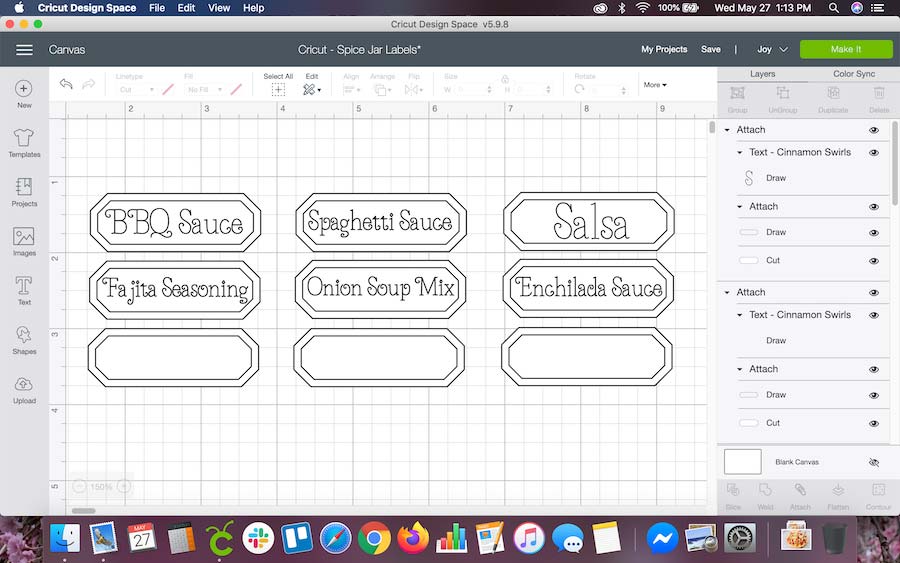
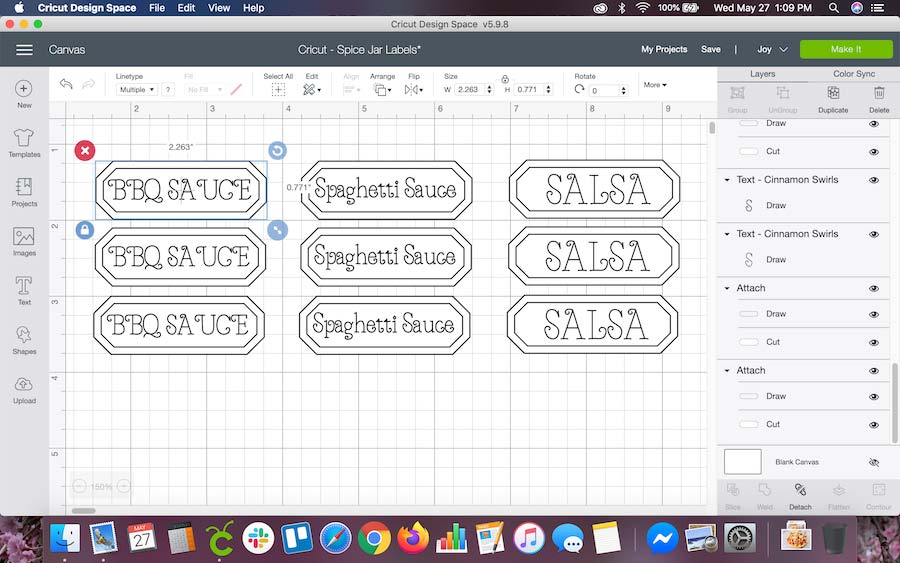
I deleted everything and left myself one blank row. I copied and pasted the entire row twice to create 9 labels total.
Also, feel free to leave some blank like I did! This writable vinyl can also be written on by hand with your Cricut Joy pen!

- Re-attach the Words to the Labels
Now that your words are created, you need to re-attach them to the labels. Select each label and the writing and click attach in the lower right hand corner. This will make sure that everything cuts and writes in the correct place!
- Make It!
Click Make It in the upper right hand corner, and follow the steps to create your project.
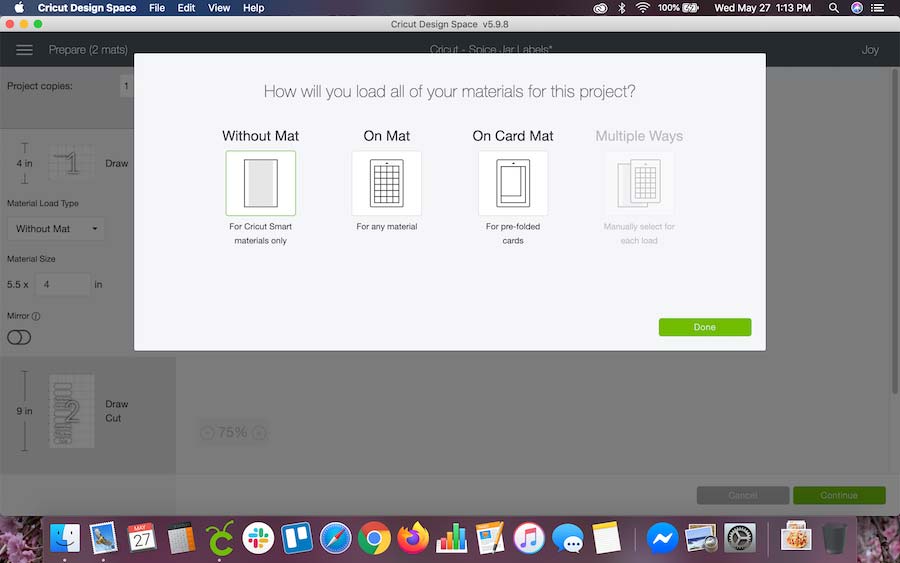
You’ll need to decide if you are using a mat or not. I’m using Smart Materials specifically designed for Cricut Joy so I won’t need a mat!
If you are using materials for the other Cricut Machines you can cut them to size and put them on one of the Cricut Joy Mats.
- Choose Your Materials
Next, choose your materials. This is similar to setting your dial on the Explore machines or clicking to select materials when working with the Cricut Maker.
- Choose Your Options
The screen will also show you what other materials you need for cutting and writing. You can choose whatever color pens you’d like to use, though gel and glitter pens are not recommended for use with the writeable vinyl.
- How to Use a Pen With Cricut Joy
Now we’re ready to cut and write. Switching out the blades and pens on the Cricut Joy is super easy. Just flip the little blue flap open and slide them in and out. Secure them in place by pushing the flap back into the closed position.

- Does the Cricut Joy have Buttons?
Have you noticed that this whole time we didn’t push any buttons on our Cricut Joy?! It doesn’t have any. None. You do everything from your Design Space App on your phone, computer, or tablet!
- First Write, Then Cut
The Cricut Joy will write first and then cut your labels. Be sure to load your pen first, then switch out for the blade.
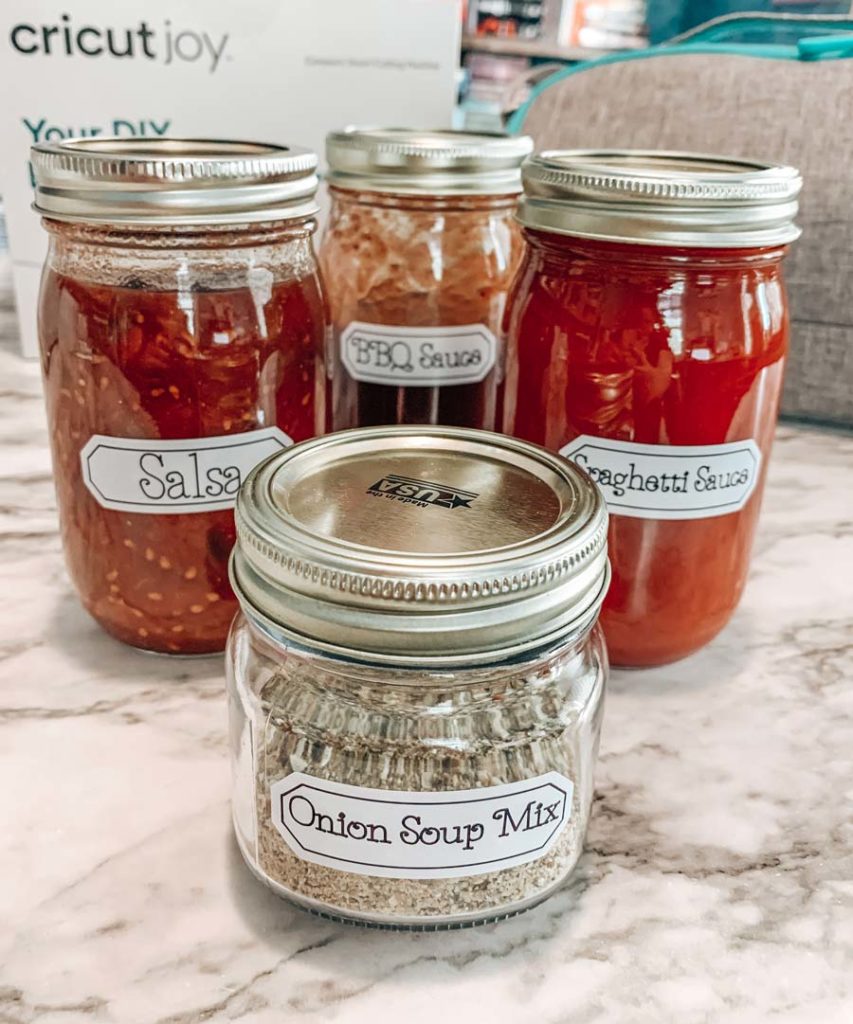
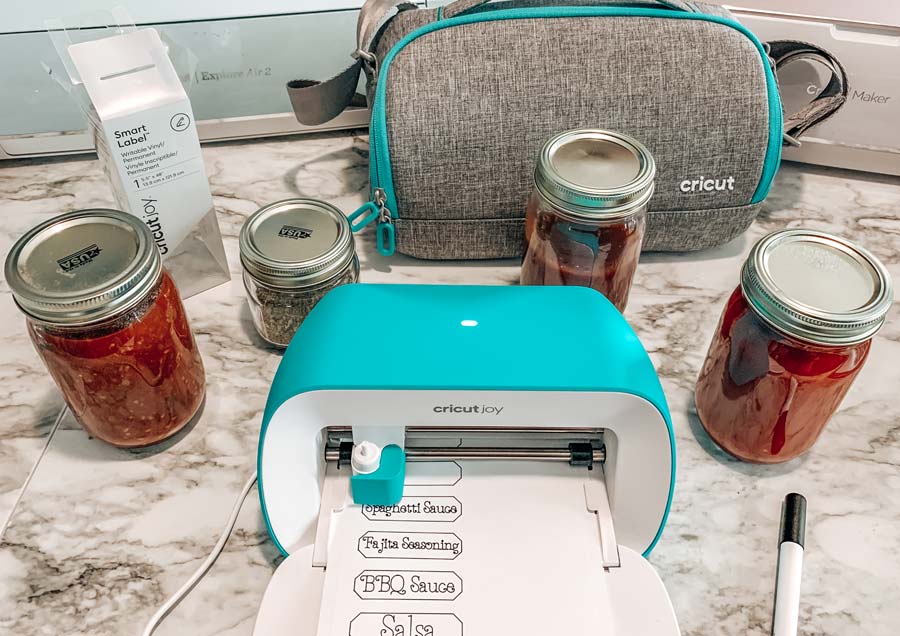
Once the labels are written and cut, we can peel them off the Smart Label paper and stick them in place on our jars.

- Ta-da!
It truly is as simple as that. The ink dries super fast, these were completely dry by the time the Joy was done cutting!


More Cricut Joy Projects:
Quick Project #2: Customize Your Air Pods Case
If you have air pods you probably already know that they’re a little bland looking. Sure, they sound great and make life super easy with their magical technology but we are creative…we need to spice up that super white case!
Check out this easy tutorial for how to customize your Apple Air Pods Case with the Cricut Joy!
Quick Project #3: Put That Cricut Joy Card Mat to Good Use:
One of the most unique accessories for the Cricut Joy is the reusable card mat. It allows you to cut a card that is already folded. The cards come with inserts, folded cards, and envelopes so you can create a card in just three or four button presses.
If your kid forgets to tell you they need a card for a friend, if you need a card to take with as you cheer someone up, drop off a gift, or visit with dinner…the Cricut Joy can have you covered in no time.
Learn how to make custom cards in a flash with this tutorial.
Why do I need a Cricut Joy if I have another Cricut Machine?
I’m sure you’ve noticed that we’re pretty Cricut crazy around here. There’s posts for your Explore machines, the Maker, EasyPress, and now…of course the Joy.
If you are wondering if you need the Cricut Joy the answer is yes! The Cricut Joy is the easiest way to customize and personalize anything with just one cut and color. In 15 minutes or less you can have custom vinyl, cards, labels, and so much more.
Anyone out there customize crafts to sell? If that’s you…the Cricut Joy is a lifesaver. You can easily pack up this machine into the most adorable travel bag and be on your way. It’s one cord (that could run off of a portable jump back or battery pack) and simple materials. You can run the whole thing from your smartphone which is always with you anyway, right?
Finally, if you like to craft with friends the Cricut Joy is a game changer. You can so simply and easily transport this machine that it will make crafting on the go and in different places instantly possible.
The whole system is so compact that you don’t even need a craft room…hello crafters who live in RV’s, vans, etc. Artists don’t have to be confined to a huge space in order to have the tools they need to create!
That being said, the Cricut Joy packs a big punch. You can create designs up to 20 feet long with repeating cuts. You never have to switch out your mats, the material measures itself, and you can load it directly into the machine without any buttons.
There are endless possibilities for decorating your home, workspace, appliances, and more!
Check it out for yourself!
If you want to learn more, get your very own Cricut Joy, or shop for Smart Materials you can do that here at the Cricut website. Cricut Joy is also available in stores like Joann, Michael’s, and even Walmart!


Thanks for sharing a wonderful article.