This site contains affiliate links. Please see Policies for more information.
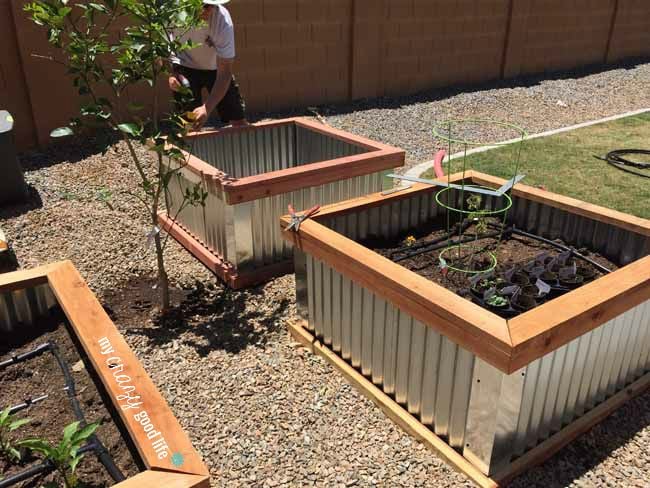
A few months ago my darling husband decided to appease my spontaneous idea of a garden (though historically, I have a very black thumb) and went a step further to build me a few beautiful DIY raised garden beds with corrugated metal and redwood.
I’ve had so many people ask for the details about these garden boxes and how he made them that I decided I had to share them here!
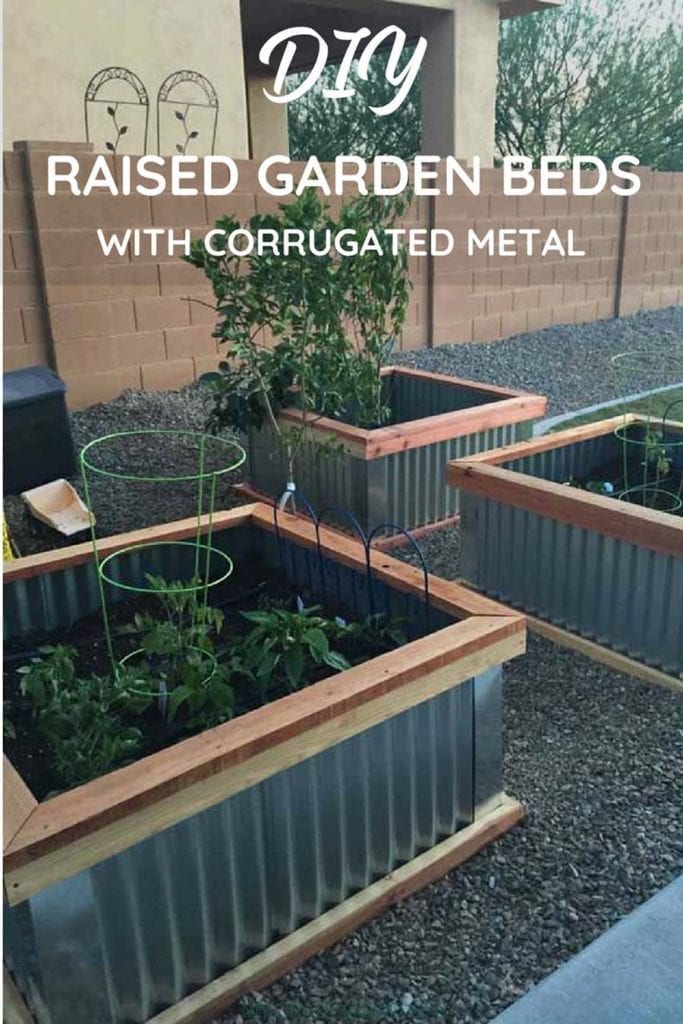
Growing our own vegetables is one of my favorite hobbies. I love that I can see them grow from seed to food and especially love that I know exactly what goes into them. I love when the kids (and sometimes the dogs…) pick snacks from the garden and I especially love going out with a big bowl before dinner and grabbing ingredients.
Links to the items you’ll need to build a raised garden bed:
These items will make one raised bed
- 2 – 4′ x 8′ pieces of corrugated metal or this Corrugated Garden Bed Kit (click here to buy on Amazon) if you’re unable to cut the metal. The garden bed kit is a convenient raised garden bed kit on amazon. It has short sides–it’s 10.5 inches deep and is just over 3 feet long.
- 1 – 4″ x 4″ x 8′ piece of metal flashing, cut into 4 – 22″ sections
- 4 – 2″ x 3″ x 8′ pieces of wood (we used redwood, it was not pressure treated wood) for the box frame
- 2 – 3″ x 4″ x 8′ pieces of wood ripped in half for the decorative box top
- Deck screws: click here to buy on Amazon
Optional Items:
- 4×4′ chicken wire (click here to buy on Amazon) for the bottom of the box. This is used to prevent animals from tunneling under the box.
- Soil Conditioner: click here to buy on Amazon
- Drip tube: click here to buy on Amazon
A few notes:
- Cutting the corrugated metal was definitely the toughest part. You’ll need two people to do it, and safety glasses are a must. We purchased a blade for the skill saw (click here to buy on Amazon) specifically used for cutting metal.
- These aren’t the most cost effective boxes you can make, but they’re beautiful! Each box cost us approximately $100. You can use different wood to get the price down.
- The corrugated metal has to be vertical for structural purposes.

Here’s how to build a raised garden box:
Time needed: 1 hour and 30 minutes
We loved making these planter boxes, and still use them–years later!
- Cut your supplies.
You’ll need to cut the corrugated metal and metal flashing into four 22″ sections, the redwood for the box into eight 48″ sections, and the redwood for the decorative top of the box into four 48″ pieces that are ripped in half (cut in half) to make it look a little nicer.
Remember, we did not use pressure treated lumber but you’re welcome to.
Here’s a picture for that last one, where you can see the thinner top piece: - Make the bottom frame
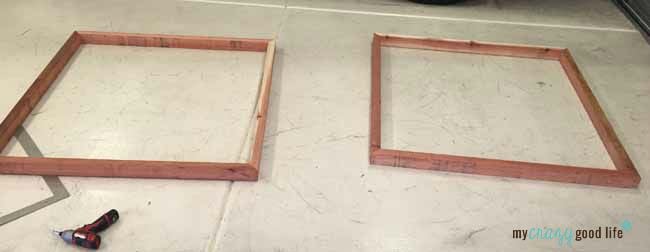
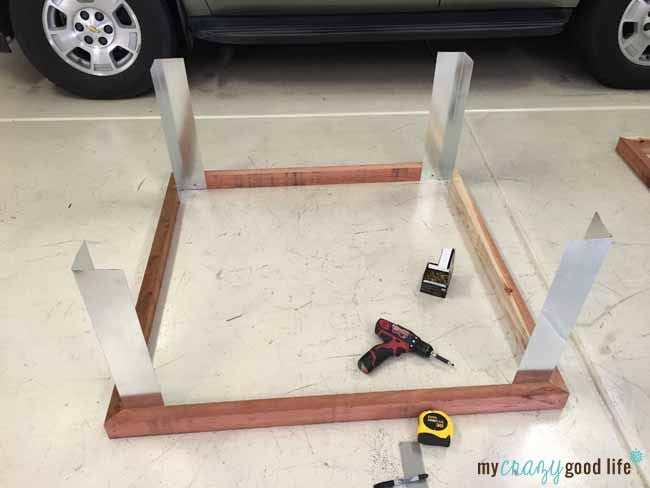
Use four of the 2″ x 3″ x 4′ pieces of wood to make the bottom frame of the box. Once we cut the corners to fit together, we used deck screws to secure them together.
To prevent your wood from cracking near the ends, drill pilot holes before using the screws. - Add flashing to sides
Next, we fastened the metal flashing to the corners of the bottom frame of the boxes. This was definitely easier to do with two people.
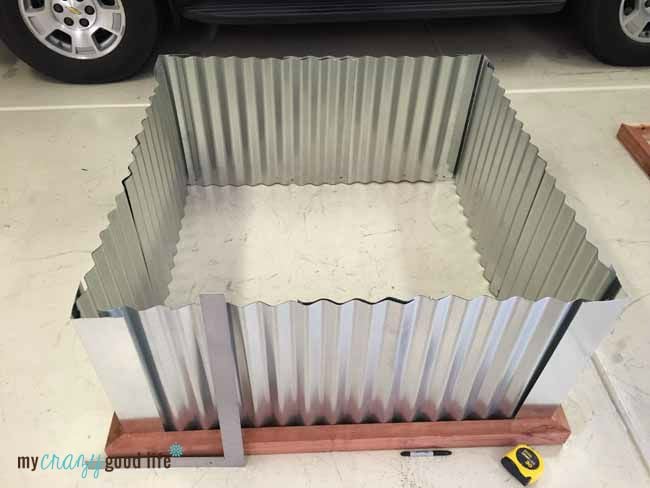
- Add the corrugated metal
Again, this step is easier with two people.
Steve sat inside the box while I sat outside with a right angle, making sure the metal was straight before he screwed it in place. - Flip and secure
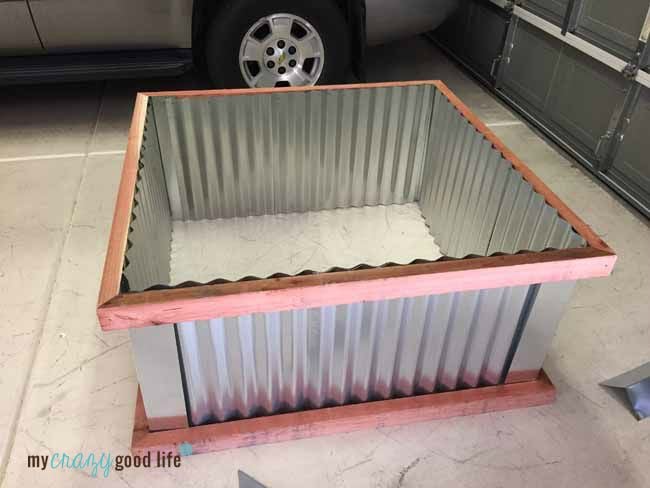
After securing the corrugated metal, we flipped the planter over so the metal fit just inside of the other box frame. We secured that with deck screws.
- Optional Step:
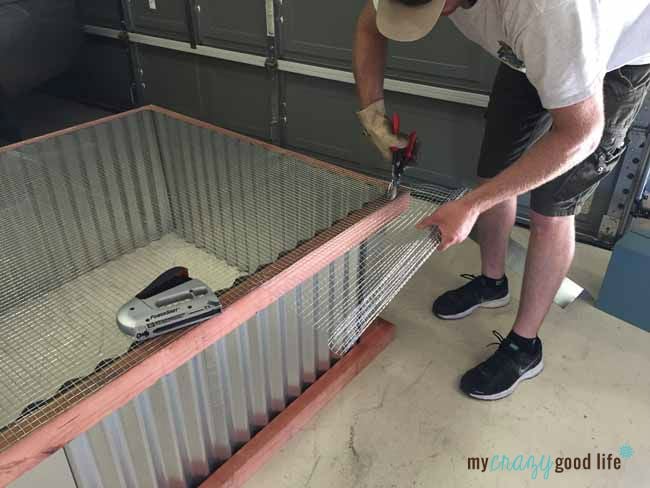
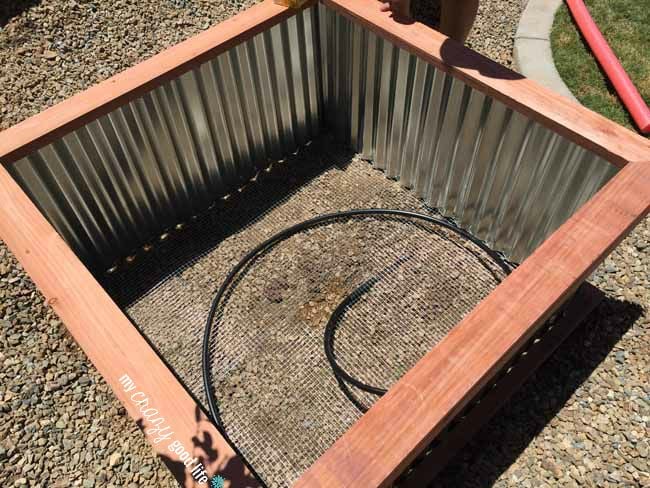
Secure the chicken wire to the bottom of the box with a staple gun. Again, we did this to make sure no animal could tunnel under the boxes.
- Add top frame
Flip the box back over and secure the top decorative frame to the box. This makes the box a bit more polished and gives you a place to sit or place your garden supplies.
- Add drip tubing
After securing the top, we carried the planter outside and pulled our drip tube through the chicken wire.
- Add soil
We filled the boxes with garden soil, making sure the drip tube stayed at the top.
How to fill your garden box:
- After you build a raised bed, you should ideally wait a day or two before planting seeds. You might think about which soil amendments (if any) you’d like to add, and plan out which plants will be best in the same box.
- If you’d rather not fill the entire garden bed with soil, some people like to put recyclable items at the bottom of their garden box first–empty milk containers, cardboard boxes, bottles, etc. This allows for better drainage and costs less money in soil.
- Remember that after your garden box is filled with soil it’ll compress a bit. I’d wait a day or two and fill with some more dirt before you start planting.
- If your beds need some shade, you can use a small garden trellis on each side and adhere landscaping fabric to each side, making a shade for your plants. I’ve found that tomatoes love the shade.
- We were gardening newbies when we started, but I have to say that I think we’ve done a pretty good job in the last few months!
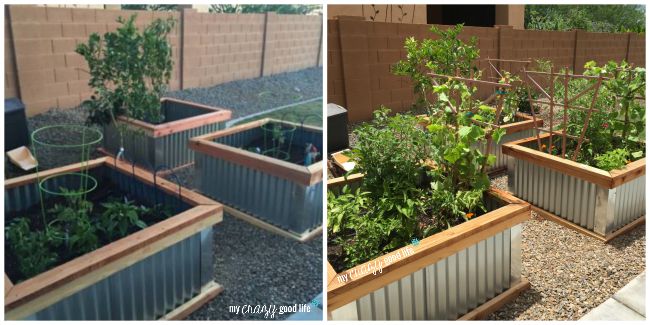
This garden bed project is one of the most fun DIYs we have done–you can use them for a herb garden, a glower garden, or a traditional vegetable garden and they’re pretty easy to build.
These beds are not rot resistant, but we have not had any issues with this in the years that we have had them up–they’ve helped us grow a ton of vegetables and they’re so easy to plant in every year.
Does the corrugated metal heat the soil in the boxes?
We have been asked this question a lot, and despite living in Tucson where the weather is hot and dry, we haven’t had an issue with the soil getting too hot. We have had great success growing many different types of herbs and vegetables in our raised bed garden boxes and wouldn’t do anything different if we built more down the road.
What have you grown in your raised bed garden?
We love growing tomatoes, zucchini, cucumbers, green beans, strawberries, carrots, and have had awesome luck with hot peppers. Last year we dedicated one garden box to just peppers–jalapeños, serranos, cayenne, and Carolina Reapers. I think hot peppers grow better when they’re together in a garden box. We have grown one pepper plant in a box with other vegetables and it didn’t do nearly as well (or get nearly as hot) without the other peppers.
Looking for another fun and easy DIY project? Try making this Giant Jenga game!
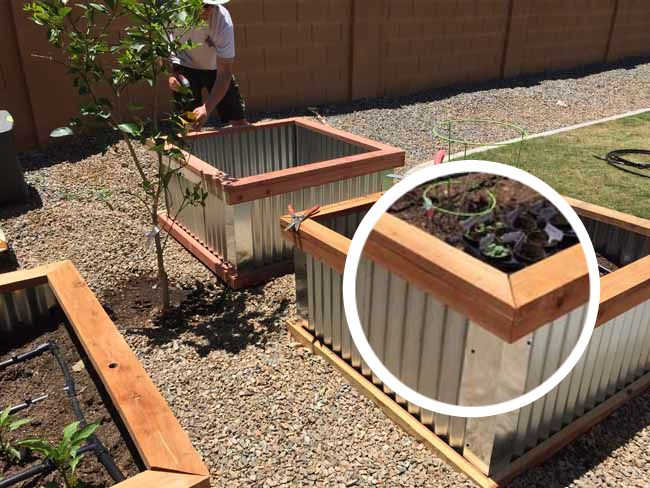























An easy way to cut the corrugated metal is to flip an old, used circular saw blade so the teeth are in the opposite direction. Always use safety goggles.
A nibbles is also a good tool to use to cut corrugated metal. It takes little half moon bites out of the metal without throwing any metal or sparks at you, but still wear your safety glasses. My nibbler fits on my drill which works fine. I cut all the metal I had to on my pole barn with it.
Excellent directions and not only being stronger placed vertically BUT the sheet metal looks MUCH better. I’ve seen hundreds going horizontally and they look much too industrial for my taste! Nothing but kudos on the project with one tiny comment: It appears that you may have actually used ‘Hardware Cloth” (1/4″x1/4″) square wire) per your photos, rather than 6 sided (hexagon shaped} known by most farm type folks such as myself as chicken wire which is probably big enough to let dreaded voles tunnel up into your bed. I apparently have about a gazillion voles in my new back yard and am looking for ideas on raised beds (voles can’t climb galvanized steel) but in my quest I repeatedly see ‘Hardware Cloth’ be used n the bottom. I imagine anybody who sees your incredible design will copy it but you might consider a name clarification of the type wire (or the size of opening used) least someone with voles builds your BRILLIANT AND SO AESTHETICALLY PLEASING RAISED BEDS!!
Very nice, simple and economical design. We intend to build 3 this weekend. Once point of concern for us is that we have a toddler so we want avoid the sharp edges of the metal flashing used to fortify the corners. Do you have any tricks or suggestions for rolling the edges over or adding something to make these less sharp for small people? Thanks!
Rob
Hi Rob, the wood on the top was more than sufficient for covering the sharp edges, you shouldn’t have to do anything else!
Does the corrugated metal rust?
We haven’t had rust on ours, and it’s been several years.
where did you get the flashing used for the corners?
Home Depot :)
What would you suggest using on the bottom if you would put this on legs. If course the bed would be smaller than this size so it would not be so heavy.
Is there no need for vertical wood pieces for support in the corners? The flashing is sufficient?
The flashing alone was sufficient for our beds :)
I loved this tutorial! Using corrugated metal gives such a modern touch to raised garden beds. I can’t wait to try this in my backyard. Thanks for the clear instructions and tips!
Great post! I’ve been wanting to create raised garden beds and the idea of using corrugated metal is genius. I love that it’s not only durable but also adds a unique rustic charm to the garden. Can’t wait to try out these tips!